December nails can be festive without requiring a long appointment or advanced nail-art skills. A few dots, a fine line, a French tip, or one well-placed sticker can turn a simple manicure into something that feels right for holiday gatherings, winter weekends, and end-of-year celebrations. If your schedule is full, try decorating one or two accent nails and keeping the rest in a coordinating solid color.
Start with a manicure that suits your routine. Short, rounded nails offer a practical canvas for simple details, while longer almond or square shapes leave more room for motifs and swirls. For a quick at-home design, use a sheer or solid base, let each layer dry, and keep a small brush or dotting tool nearby. Stickers can simplify detailed designs, while a glossy top coat helps smooth the finish.
These 26 December nail art ideas include classic holiday colors, wintery finishes, playful treats, and designs you can adapt to your own nail shape and skill level. You don’t have to copy every detail. Pick one element, such as a bow, a snowflake, or a rich jelly shade, and make it your own.
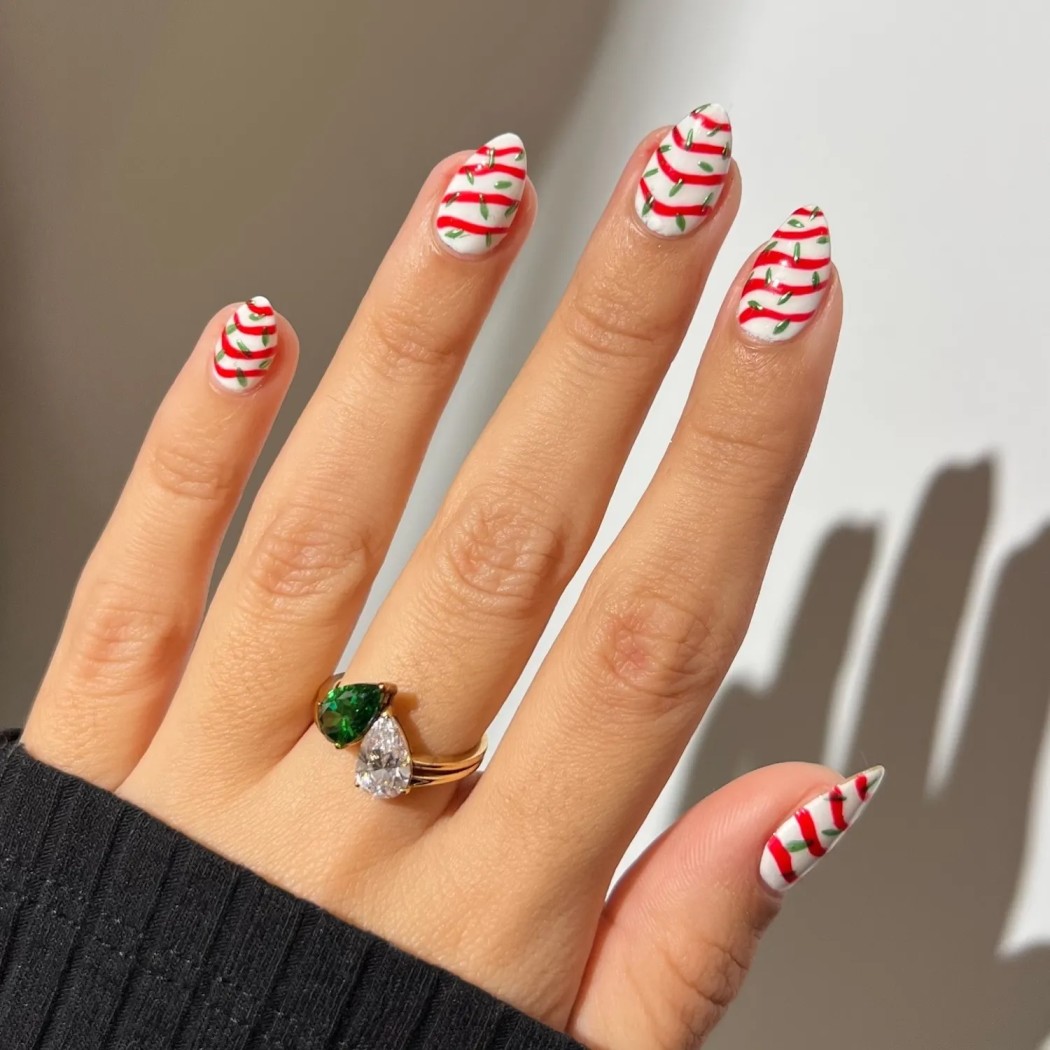
This playful design takes inspiration from the familiar Christmas tree cakes, with a green tree shape, red garland, and tiny dots for lights. It’s a cheerful choice for a festive manicure, and the hand-painted details don’t need to be perfectly even. Slightly wobbly lines can give the design a charming, homemade feel. Try it on one accent nail if you’d rather keep the rest of your manicure simple.
Start with a fully dry base coat, then paint a small green tree with a fine brush or a toothpick. Add a red zigzag for garland and a few tiny dots in contrasting colors. Short nails can use a simplified triangle and two or three dots; longer nails leave more room for detail. If painting a tree feels tricky, a Christmas-tree sticker can create a similar effect. Seal the finished design with top coat, taking care not to drag the brush through the wet art.
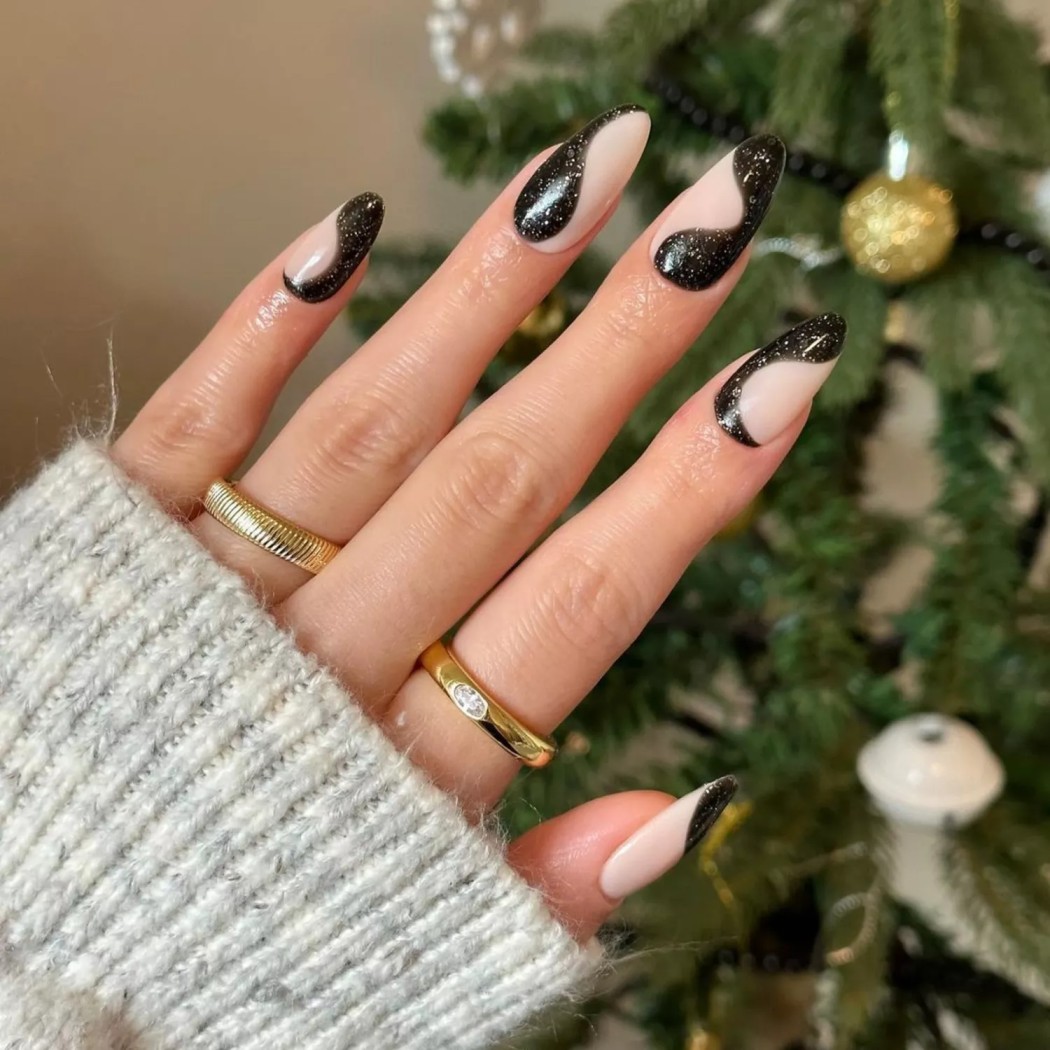
Black glitter swirls offer a dressier alternative to an all-over glitter manicure. A sheer nude or milky base keeps the look light, while a curved black line with fine shimmer brings a festive sparkle. It works well for parties and evening events, but the design can be pared back for everyday wear by using a single delicate swirl on each nail or limiting the detail to an accent nail.
Apply a thin base color and give it time to dry before adding the swirls. Use a fine nail-art brush and draw flowing curves rather than trying to make every nail identical. A glitter polish with a narrow brush is a convenient option, though a regular black polish topped with shimmer can also work. If the lines look too bold, make them thinner or leave more of the base visible. Finish with a smooth top coat to help the glitter feel even and protect the design from early chipping.
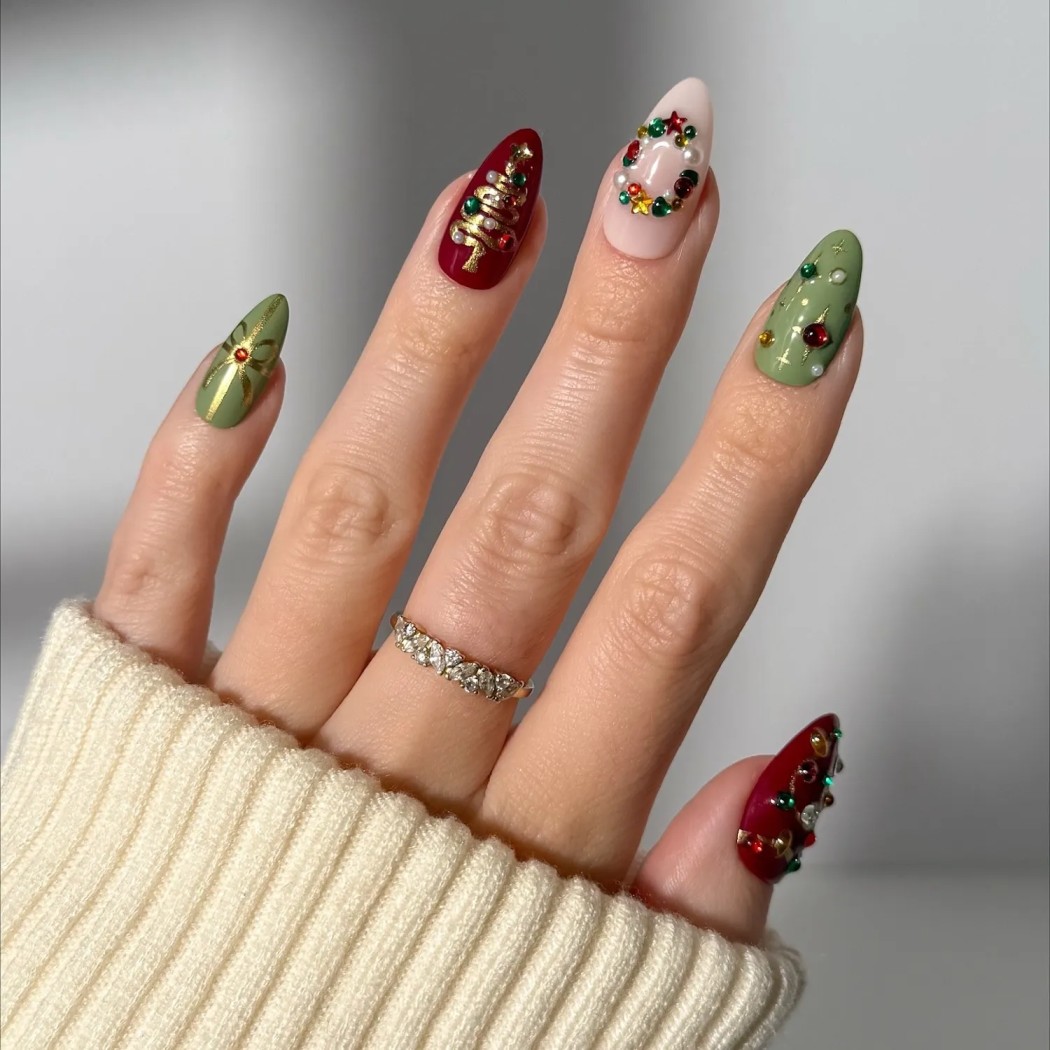
For a more decorative holiday manicure, combine color blocking with small festive details. Red, green, cream, and gold make an easy seasonal palette, while gems or tiny painted stars can add a special-occasion finish. The design doesn’t have to cover every nail: keep several nails in a solid color and reserve the trees, bows, or gemstones for one or two accents. That keeps the look celebratory without making the manicure feel crowded.
Plan the placement before you start. Paint the base colors first, then add small details after the polish is dry. A fine brush works for simple stars and tree outlines; stickers can save time on intricate motifs. If you use nail gems, place them carefully and apply them with a product designed for nail art, following its directions. Avoid attaching embellishments with household glue. A top coat can help seal painted elements, but take care not to flood larger gems if you want to preserve their shine.
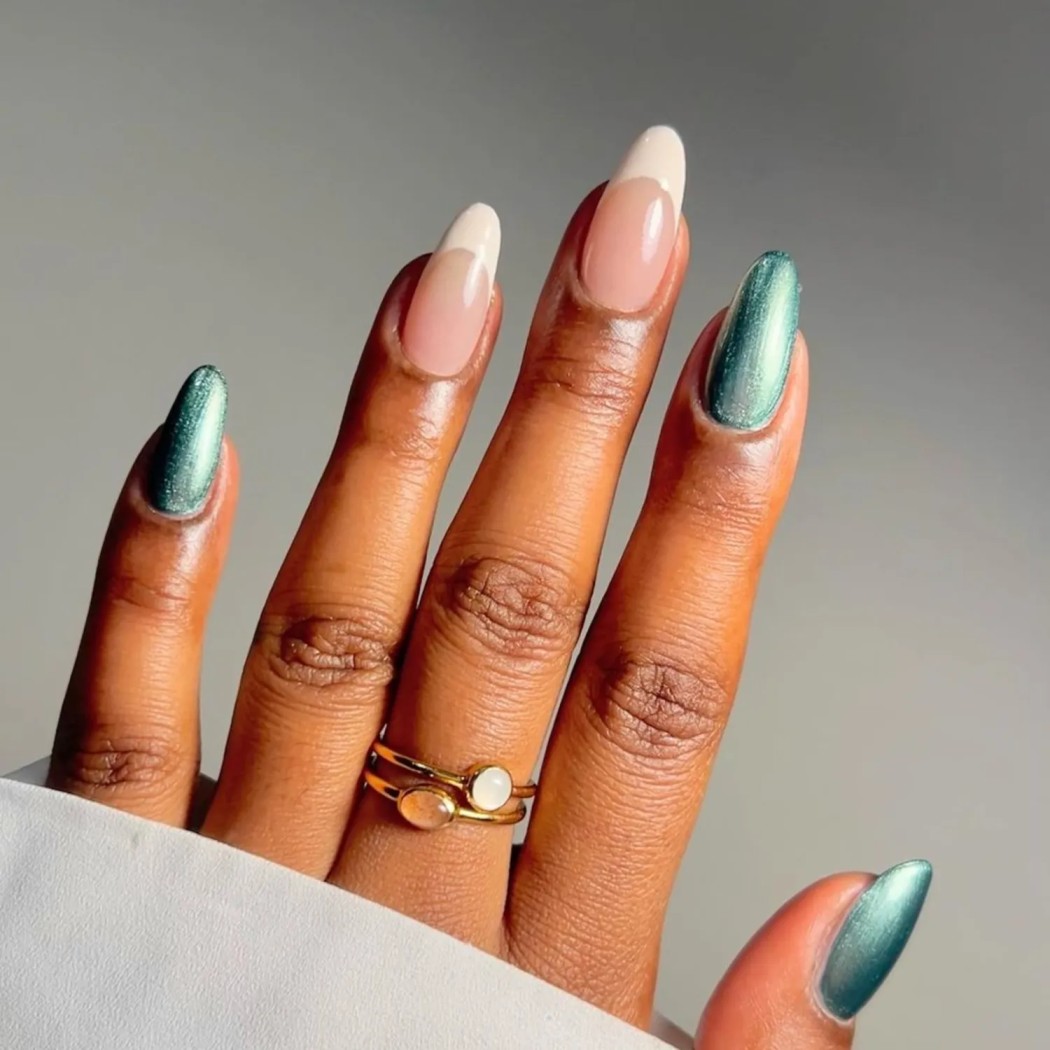
Icy turquoise and cream create a winter-inspired French manicure that feels festive without relying on traditional red and green. A sheer rosy-nude base lets the natural nail show through, while metallic teal tips add a cool, reflective finish. You can use a chrome effect over a compatible polish, or choose a metallic shade that gives you the look in fewer steps. Cream accents bring softness and make the design feel less like a solid block of color.
For a clean curve, use French-tip guides or paint the arch with a fine brush. If you’re working freehand, rest your hand on a stable surface and apply the color in short strokes rather than trying to draw one perfect line. Try the teal on just a few nails and use cream French tips on the others for a mismatched set. This combination also works on shorter nails: make the colored edge narrower to suit the available space. Let each layer dry before applying top coat to keep the edges crisp.
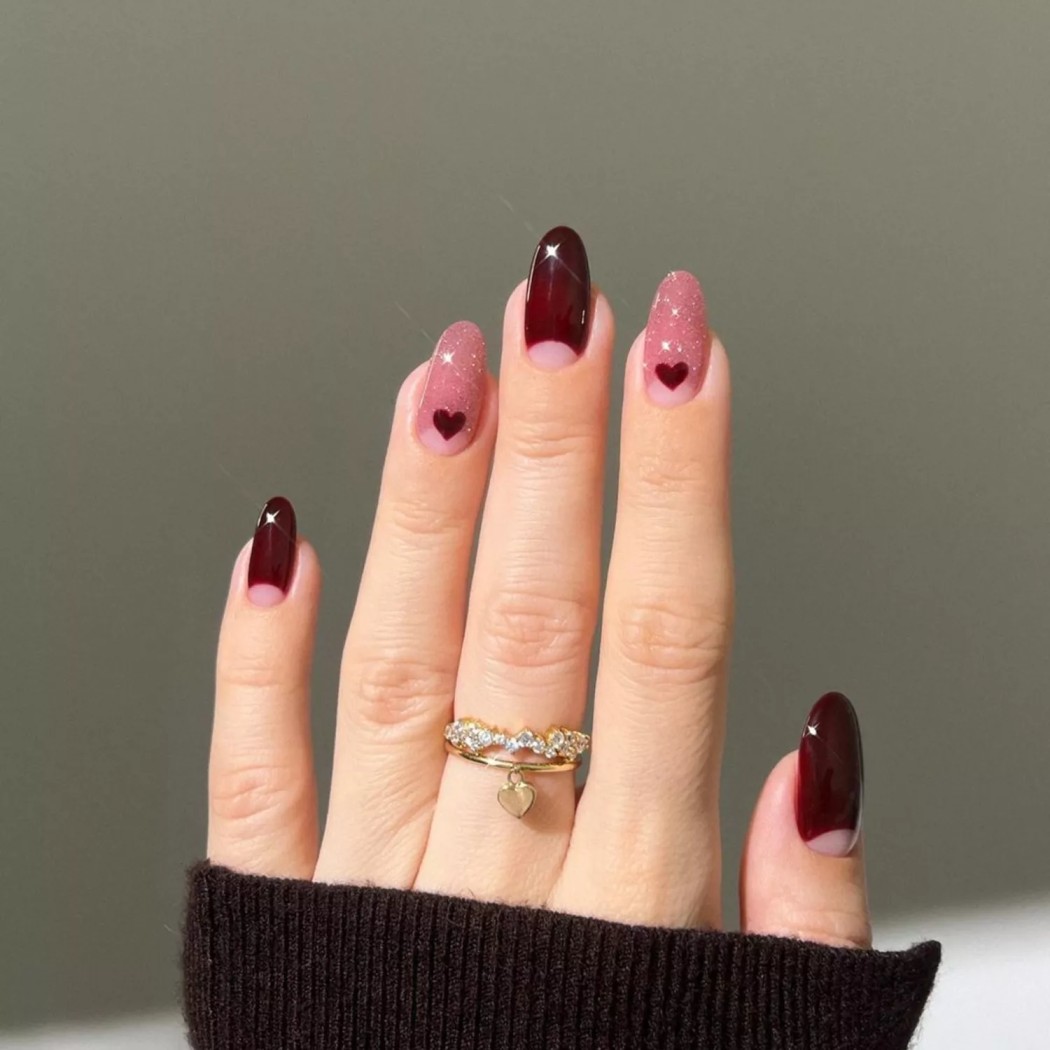
Burgundy hearts give a familiar motif a deeper, more winter-appropriate color palette. The design can be as subtle as one tiny heart on a neutral base or as graphic as a row of hearts across a rich burgundy manicure. A negative-space cuticle detail adds another shape without covering the full nail. This idea works well for December events when you want something romantic or playful that doesn’t look like a standard holiday pattern.
For simple hearts, place two small dots close together and draw them down into a point with a fine brush or toothpick. Practice on paper first if you’re new to nail art. French-tip guides can help create a clean curved section near the cuticle, but the negative-space detail is optional. Keep the rest of the nail understated so the hearts remain the focus. A sheer pink, beige, or clear base pairs nicely with burgundy. Once the design is completely dry, add top coat with a light hand to avoid smudging the shapes.
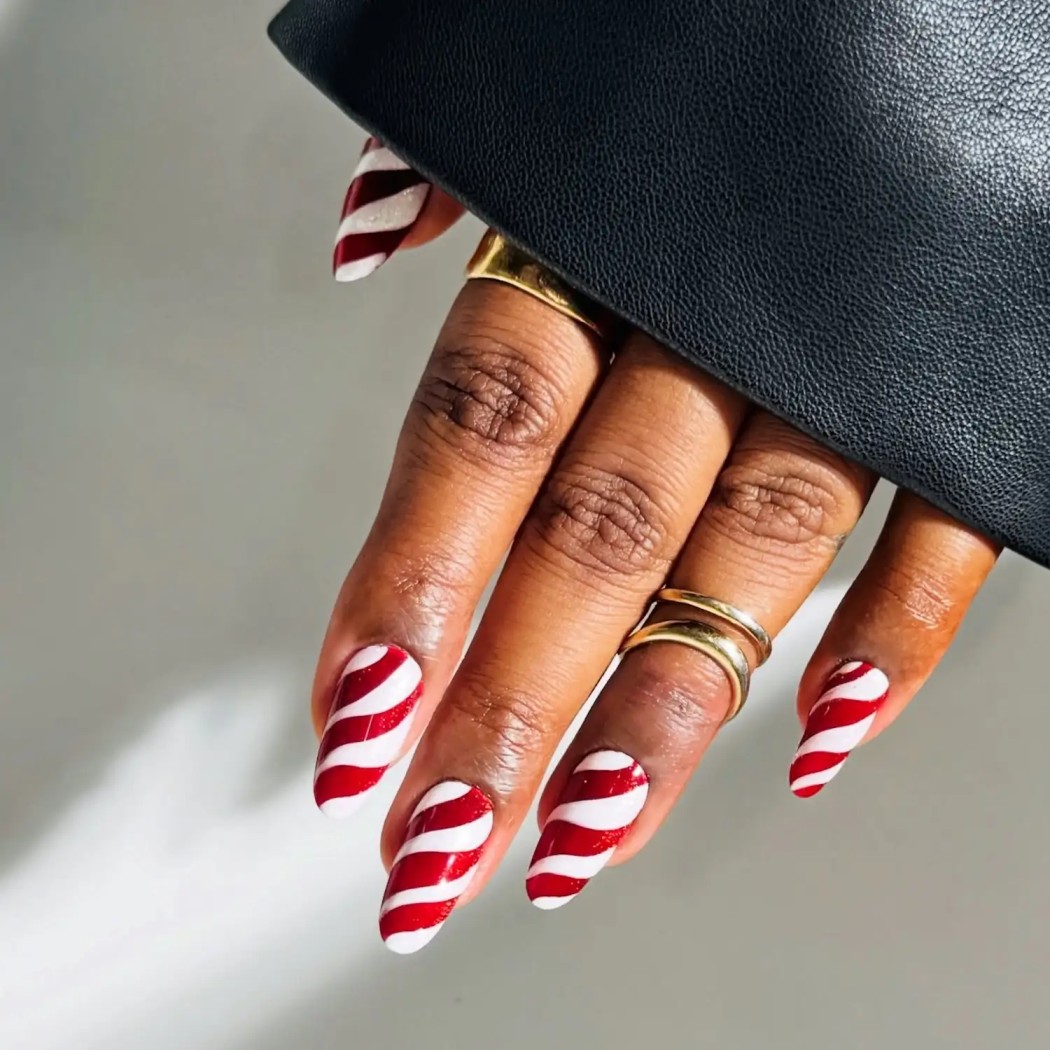
Candy cane stripes are a classic December motif, and a curved version feels less formal than straight, evenly spaced bands. Red and white make the look instantly recognizable, while a fine shimmer or chrome accent can give it extra shine for a party. You can paint the swirls over a pale base or use them on one accent nail alongside a simple red or cream manicure.
Use a fine nail-art brush to draw the curved lines, working slowly from one side of the nail to the other. It’s often easier to make a few broad, deliberate stripes than to squeeze in many tiny ones. If freehand painting feels difficult, try striping tape or a nail sticker made for this kind of design. Let the red polish dry before applying a glossy top coat, especially where the lines cross. On short nails, keep the curves simple and spaced apart so the candy-cane effect stays clear rather than crowded.
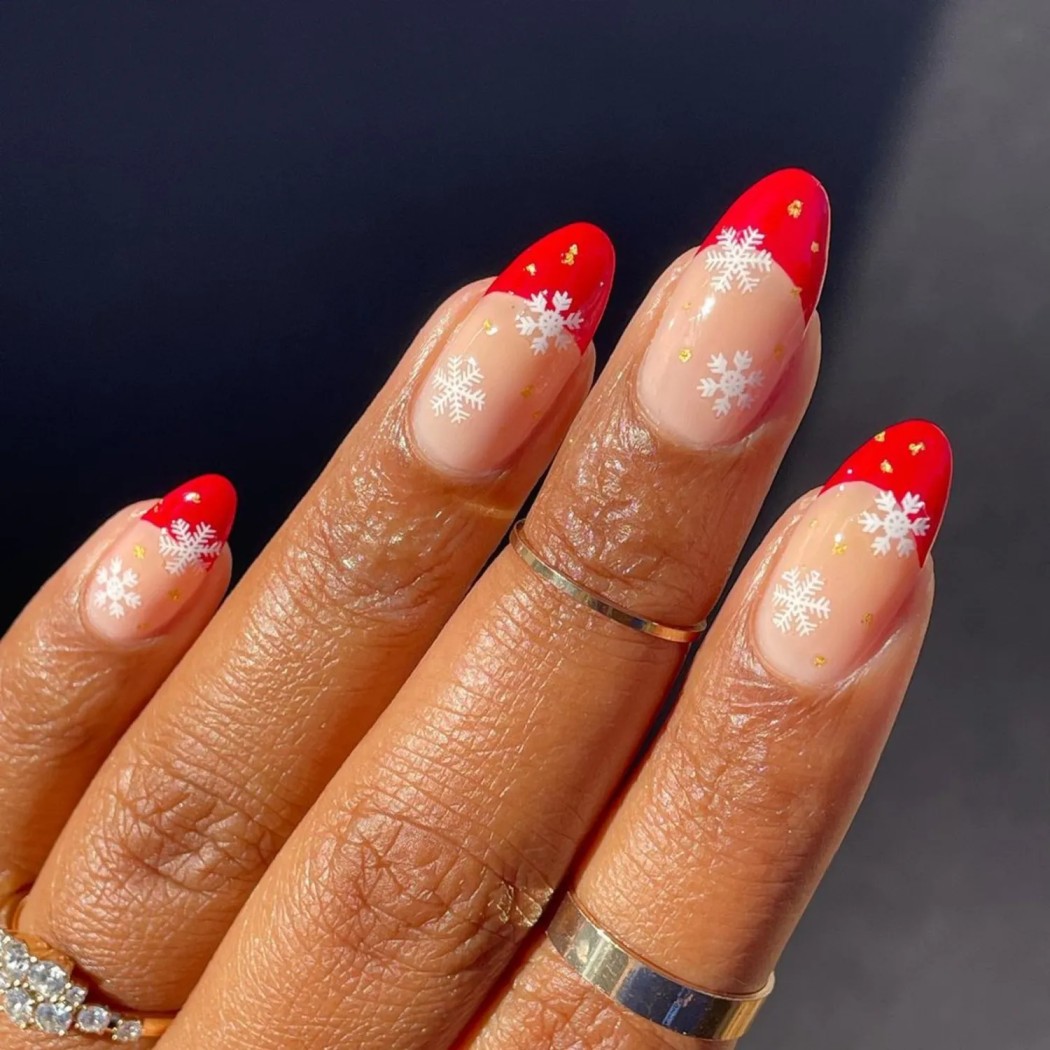
Red French tips with white snowflake details create a festive manicure that still leaves most of the nail bare. Start with a sheer nude or pink base, then add thick red arches to make the color visible. A few snowflakes on selected nails are enough to signal the winter theme without covering the whole manicure in decoration. Use stickers for a quick design or paint simple snowflakes by building lines from a central point.
French guides can help make the red tips consistent, but a fine brush works well if you prefer a softer, hand-painted edge. Let the red dry fully before placing snowflake stickers or adding painted details. Position the snowflakes where they’ll be visible, rather than placing every motif right at the tip. This design can be adjusted for different nail lengths: use a slimmer red edge on short nails and slightly wider arches on longer ones. Seal the manicure with top coat to protect the tips and smooth the surface.
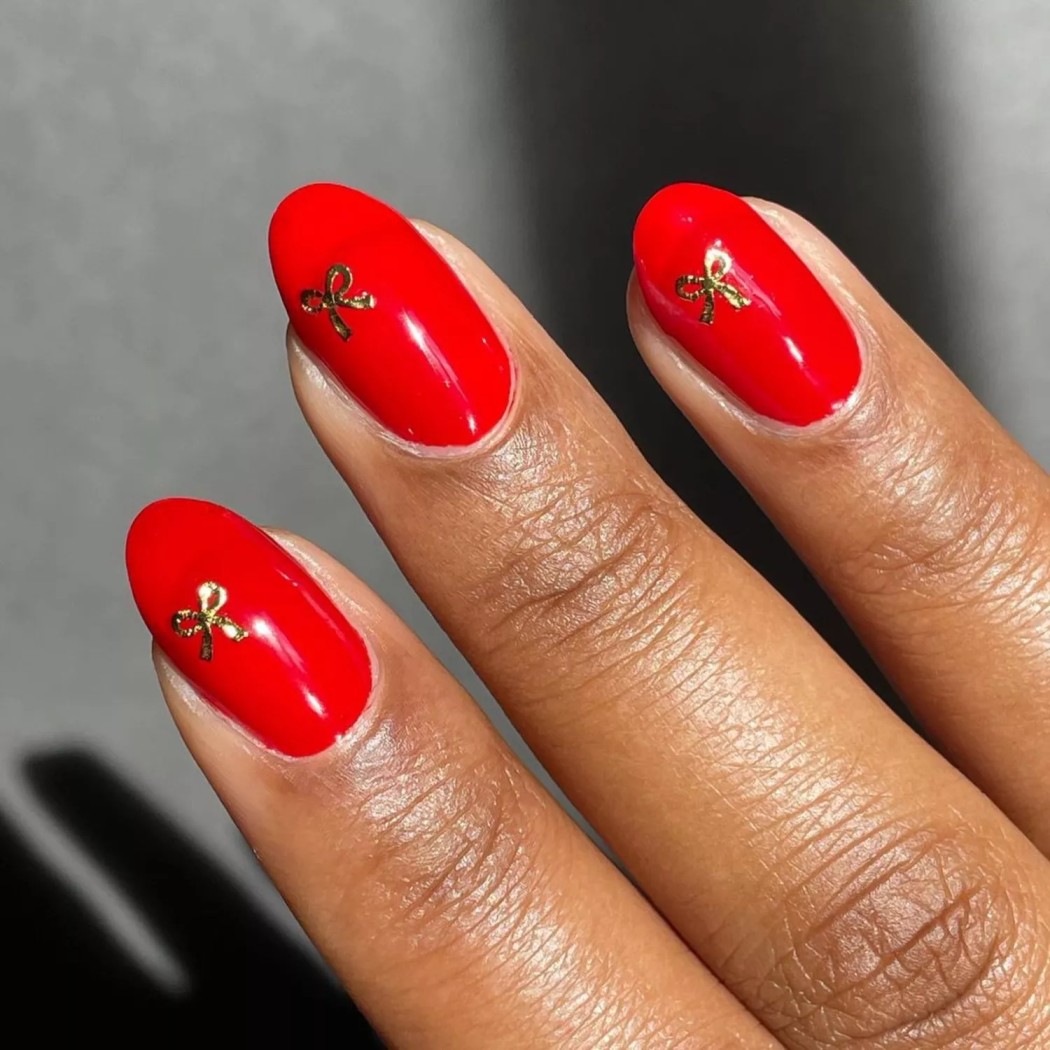
Tiny gold bows are an easy way to dress up a solid red manicure. They bring a gift-like detail to the nails without requiring a full design on every finger. Choose one or two accent nails for the bows, or place a small motif near the cuticle on each nail if you want a more coordinated look. Gold works especially well with red, but the same idea can be used over deep green, cream, or sheer nude polish.
Nail stickers are the simplest option for precise bows. Apply them only after the base color is dry, and press each sticker down gently so the edges sit flat. If you’re painting the bows by hand, use a fine brush and simplify the shape into two loops and two tails. A glossy clear top coat can help keep a sticker from lifting, but follow the product instructions and avoid applying too much at the edges. If metallic details are already part of your outfit, a small gold accent can tie the manicure into the overall look.
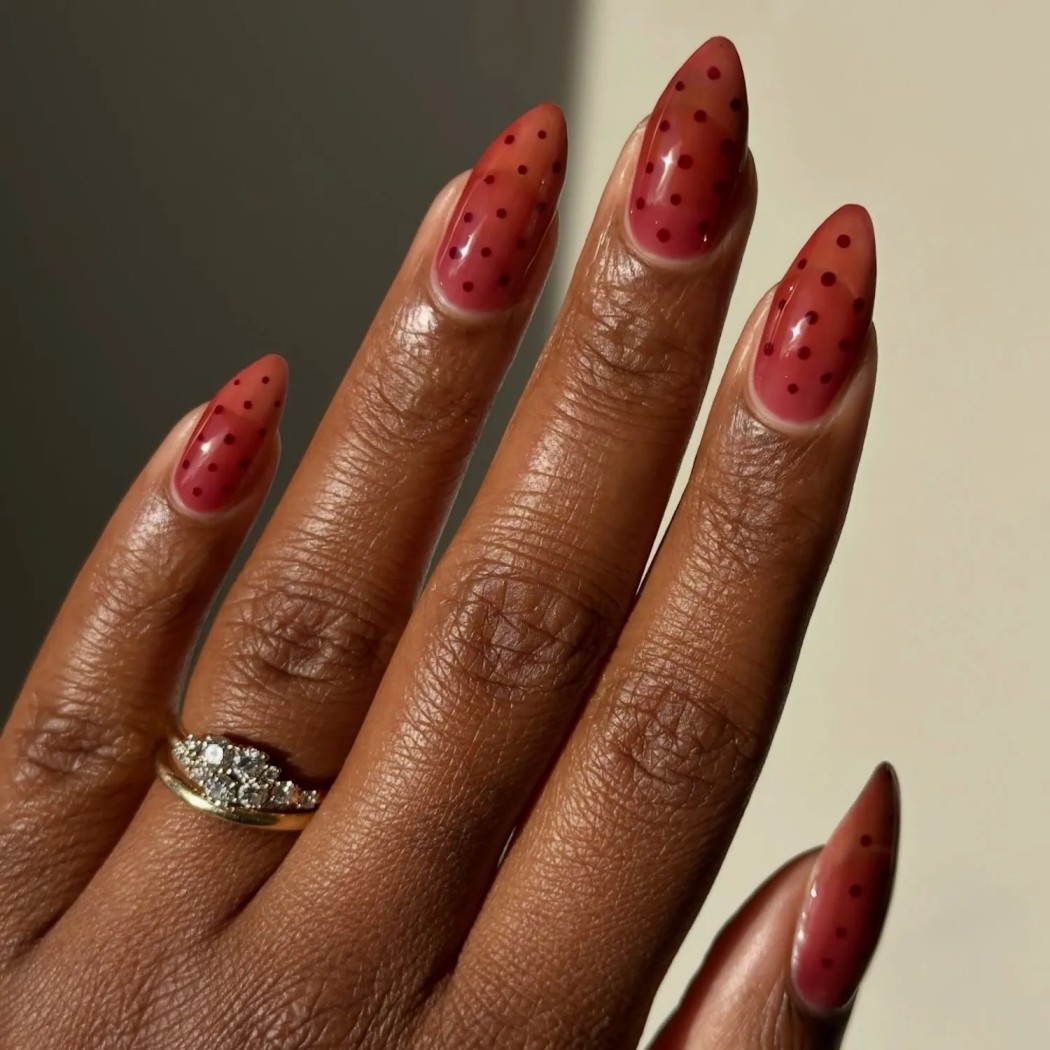
A sheer burgundy jelly base with tiny dots gives this manicure depth while keeping the design simple. The translucent color lets light pass through the polish, creating a glossy, layered appearance. Small dots in a contrasting shade add detail without overwhelming the base. Try cream, soft pink, or a deeper wine color for the dots, depending on whether you want clear contrast or a more tonal effect.
Apply jelly polish in thin coats and allow each one to dry before adding another. This helps you build color gradually and reduces the chance of a streaky finish. Use a dotting tool, the end of a bobby pin, or a toothpick to place dots in a loose pattern. Varying their size can make the manicure feel more organic. If you prefer a minimal design, add dots to just one or two nails. Finish with a glossy top coat to emphasize the translucent look and protect the manicure.
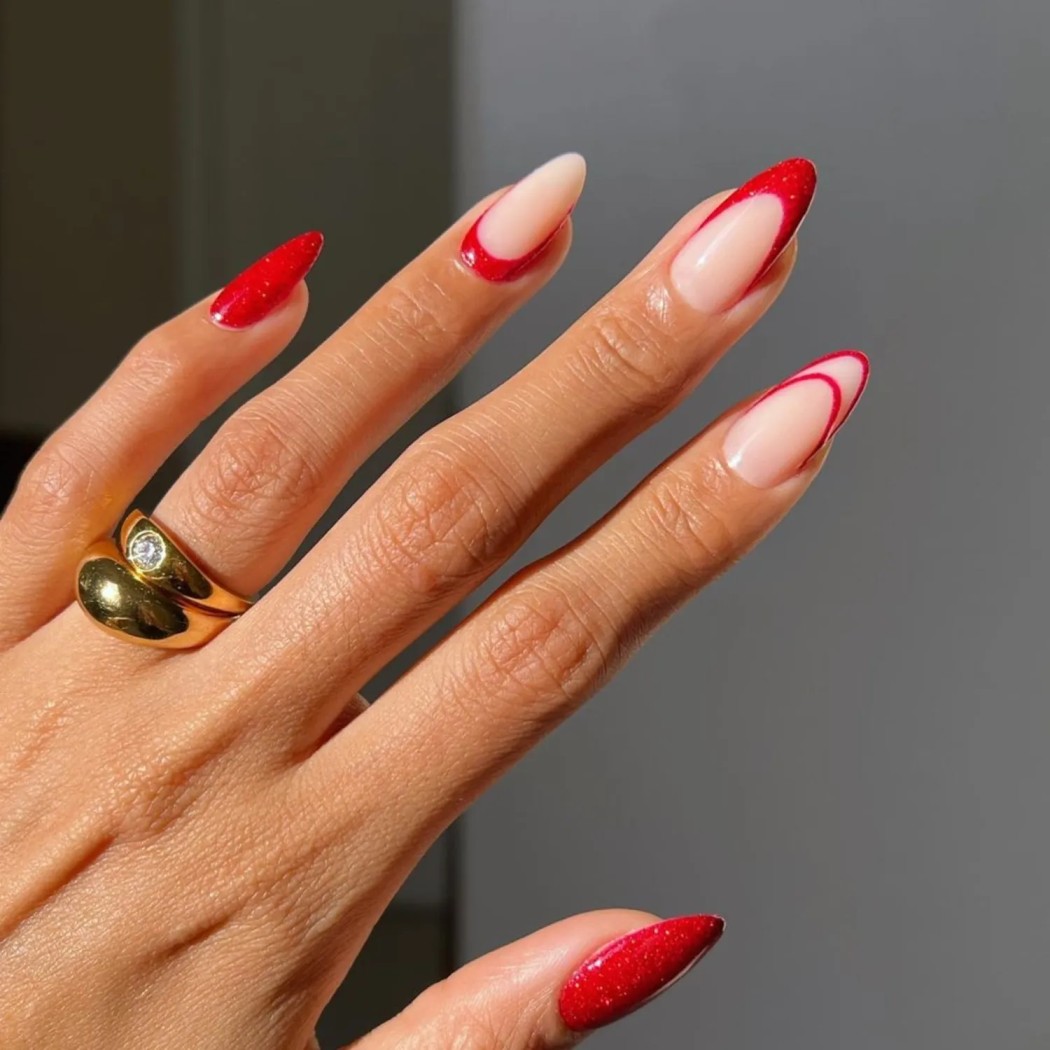
A mismatched red French manicure uses different shapes of the same color to create variety without needing a new palette for every nail. Combine classic French tips with reverse cuticle accents, cutout shapes, and a solid shimmer nail. The repeated red ties the designs together, so the overall manicure feels intentional even when each nail has a different detail.
Before painting, decide which design goes on each finger. A simple sketch or quick layout helps prevent repeating the same shape across the whole hand. Use French-tip guides for arches and a fine brush for reverse tips or cutout edges. Keep the base sheer or neutral if you want the red details to stand out. On shorter nails, use narrower tips and smaller cuticle accents to leave enough negative space. A glossy top coat brings the separate designs together, while a glitter top coat on one nail can add a subtle evening touch.
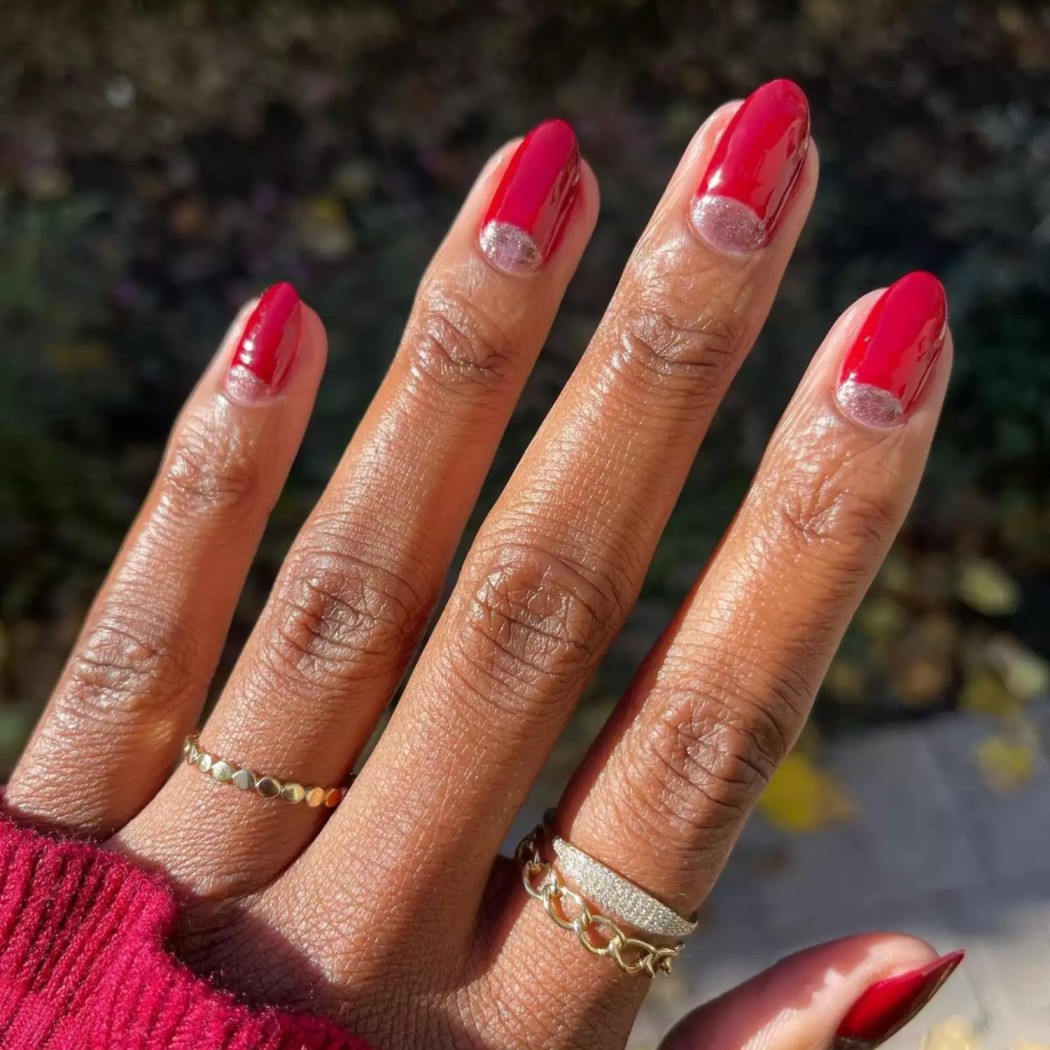
Red polish and rose-gold half moons create a neat, polished manicure with a small metallic detail. The half-moon shape sits near the cuticle, so it adds interest without needing a complex illustration. You can paint the whole nail red and trace the moon in rose gold, or leave the half-moon area bare for a negative-space version. The latter can be easier to wear between appointments because the regrowth may be less noticeable.
Let the red base dry completely before outlining the cuticle curve with a thin brush. A round-ended tool or guide can help you plan the shape, but you can also keep the metallic accent as a fine arc rather than a filled-in crescent. A metallic polish is often easier to work with than loose foil for a simple at-home manicure. Try this design with a deep wine red for a subdued look or a brighter red for a more classic holiday feel. Seal the finished nails with top coat.
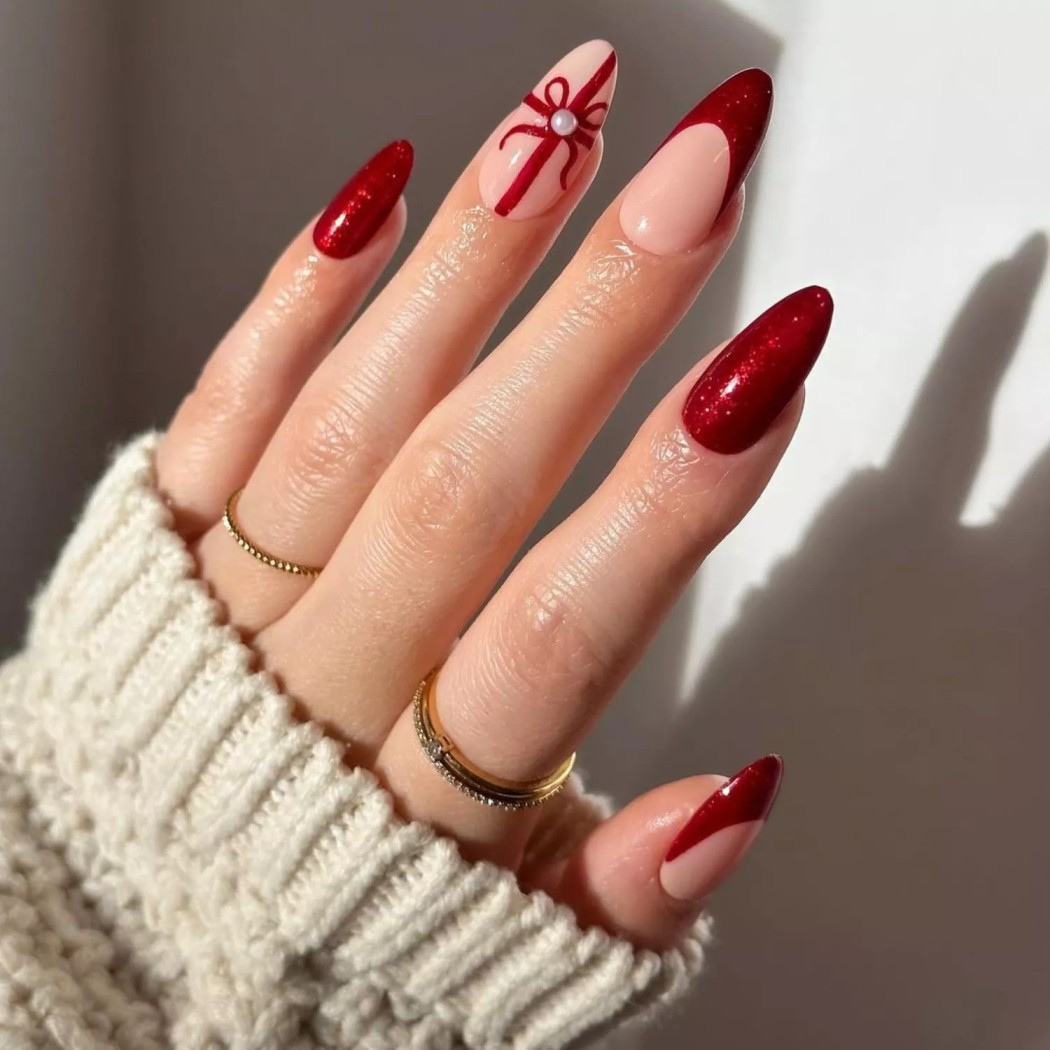
A pearl-dotted gift design makes a single accent nail feel special while keeping the rest of the manicure manageable. Start with a pearly or creamy base, then paint a vertical and horizontal ribbon to create the outline of a wrapped present. A small flat-backed pearl can act as the gift’s center detail. The remaining nails can be a matching solid shade, which lets the accent stand out without making the overall design too busy.
Use a fine brush for the ribbon lines and let the polish dry fully before adding any embellishment. For a safer, more secure application, use a nail-art adhesive intended for embellishments and follow its directions. Keep the pearl small and flat so it’s less likely to catch on clothing or hair. If you’d rather skip adhesive, paint a pearl-like dot with a pale polish or use a sticker. A clear top coat can seal the painted ribbon, though you may want to avoid covering the pearl itself if it dulls its finish.
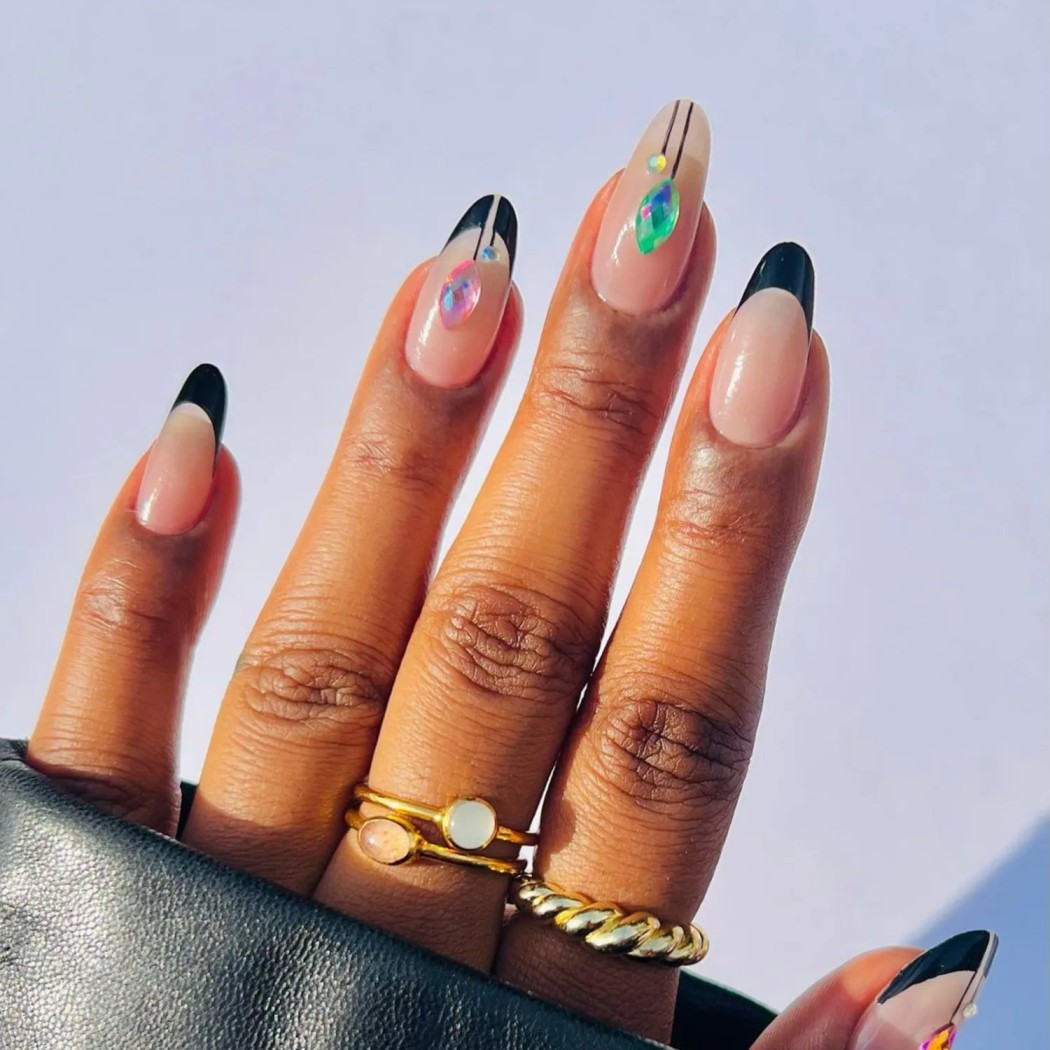
Black tips and small gemstone accents make a sleek alternative to colorful ornament art. The dark base provides contrast, while a few iridescent stones can suggest the shine of holiday decorations. Keep the motifs small and focused near the tip or upper corner of the nail. This design suits someone who wants a festive detail that feels a little more understated and works with evening outfits beyond the holiday season.
Paint the black tips using a fine brush or guides, then let them dry before adding the gems. If you’re using gemstones, choose flat-backed nail embellishments and an adhesive designed for nail use. A tiny dot or painted line can suggest an ornament hanging from a hook without requiring a detailed drawing. You can also use a metallic polish instead of a stone for a flatter, simpler finish. On short nails, one small accent per hand may be enough. Add top coat around the embellishments carefully and allow everything to set before handling fabrics or jewelry.
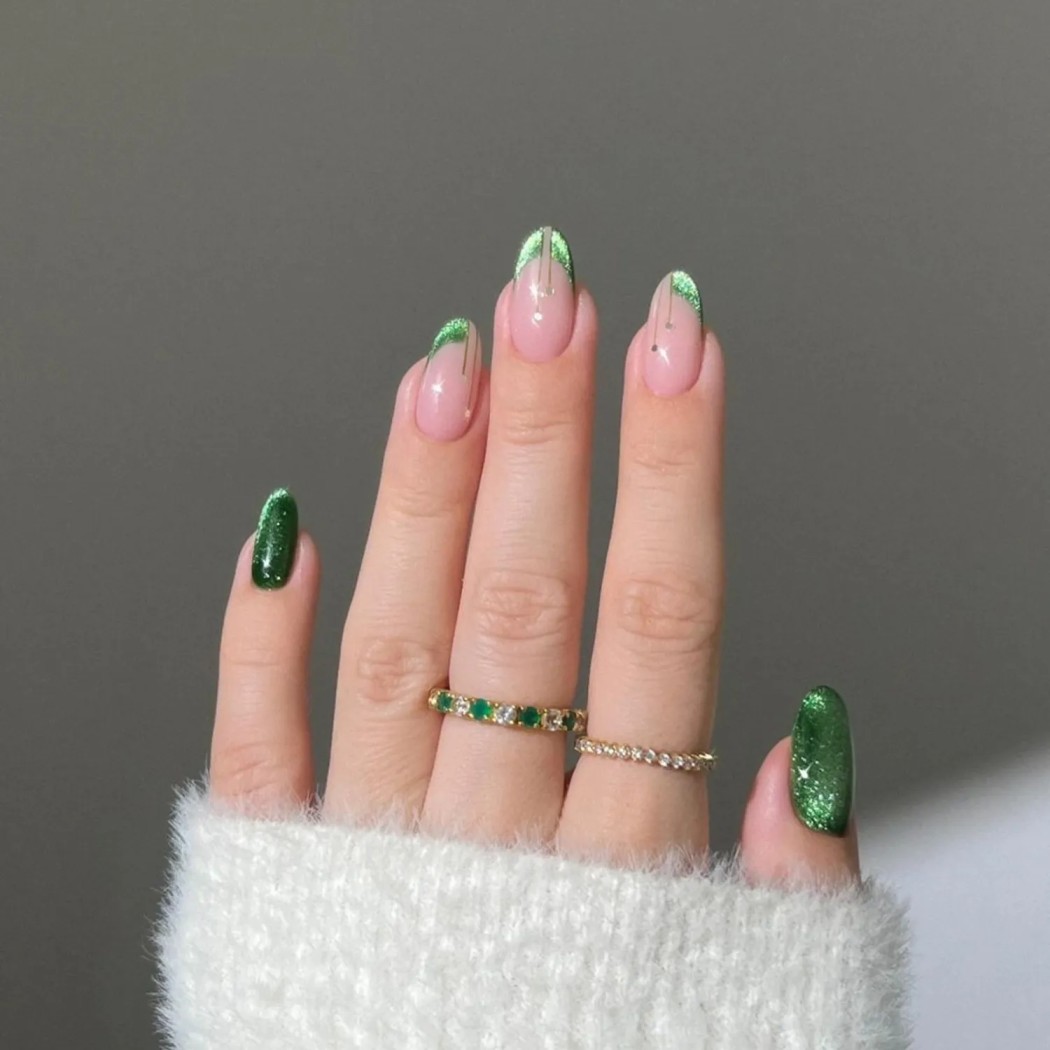
A green velvet French manicure combines a rich, dimensional-looking tip with a delicate accent. Magnetic polish can create a shifting, velvety effect when used with the magnet supplied or recommended for that product. A few small rhinestones near the cuticle or on selected fingers add sparkle, while the French shape keeps the design from becoming a full glitter manicure.
Follow the polish instructions closely, since magnetic formulas can vary. Usually, the effect is created by holding the magnet near wet polish for a short time before curing or allowing the polish to dry, depending on the product. Work on one nail at a time so the polish remains workable. If you don’t have magnetic polish, a shimmer green French tip offers a simpler alternative. Keep the base sheer or neutral to emphasize the green edge. Rhinestones are optional; if you use them, choose small flat-backed pieces and place them where they won’t interfere with everyday tasks.
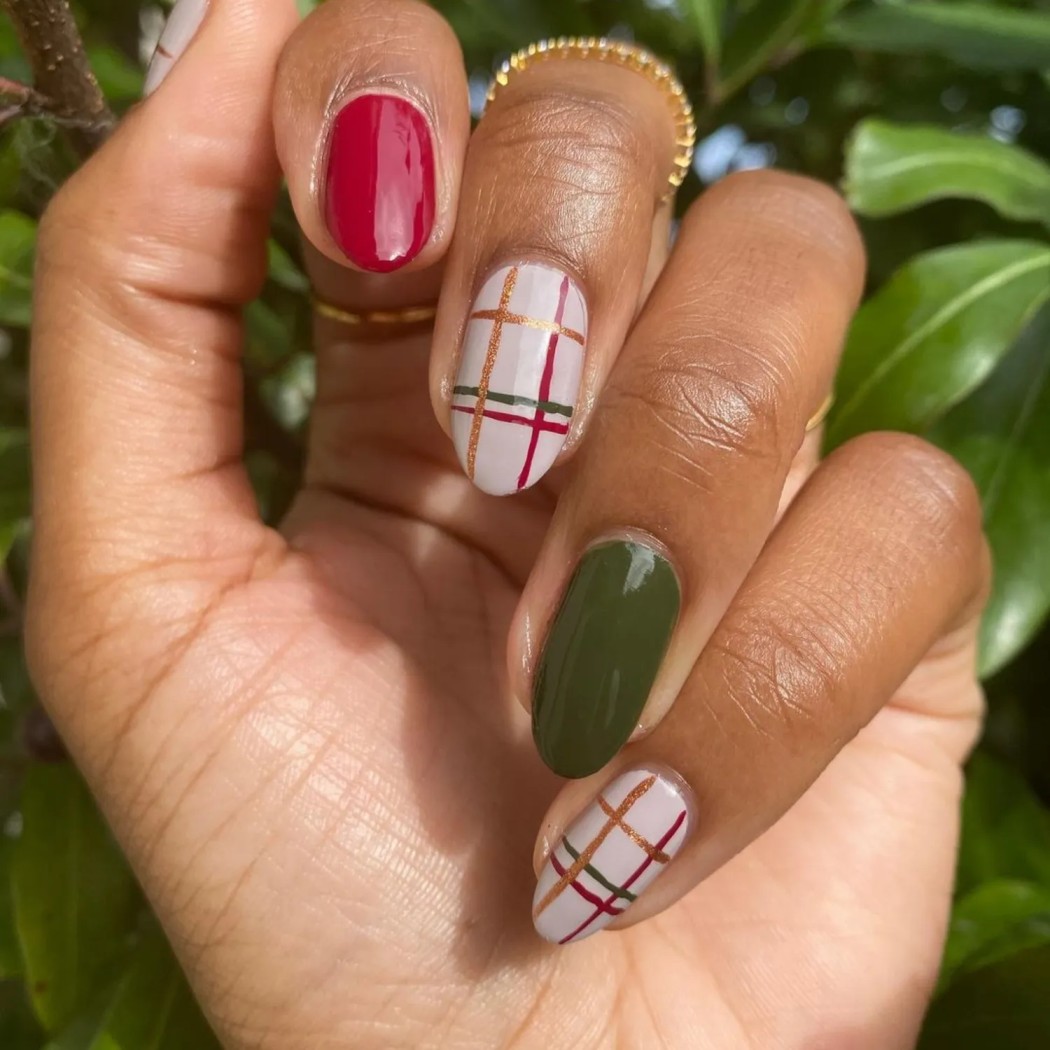
Plaid brings a cozy, classic feel to December nails. Deep red and green with cream and a fine metallic stripe can create the look of a traditional tartan, while softer dusty shades make the pattern more muted. If detailed lines feel challenging, use the same colors as a Skittle manicure, with a different solid shade on each nail, and reserve plaid for one accent finger.
For a hand-painted plaid design, start with a base color and let it dry completely. Add a few thin horizontal and vertical lines using a striping brush, keeping the pattern simple rather than trying to replicate a complex fabric. It’s helpful to apply the lightest or most transparent stripes first, then add darker lines for contrast. Nail stickers or decals are another option if you want even lines without freehand painting. Plaid tends to show best on nails with enough surface area, but a simplified pair of intersecting lines can work on short nails too. Finish with top coat once the details are dry.
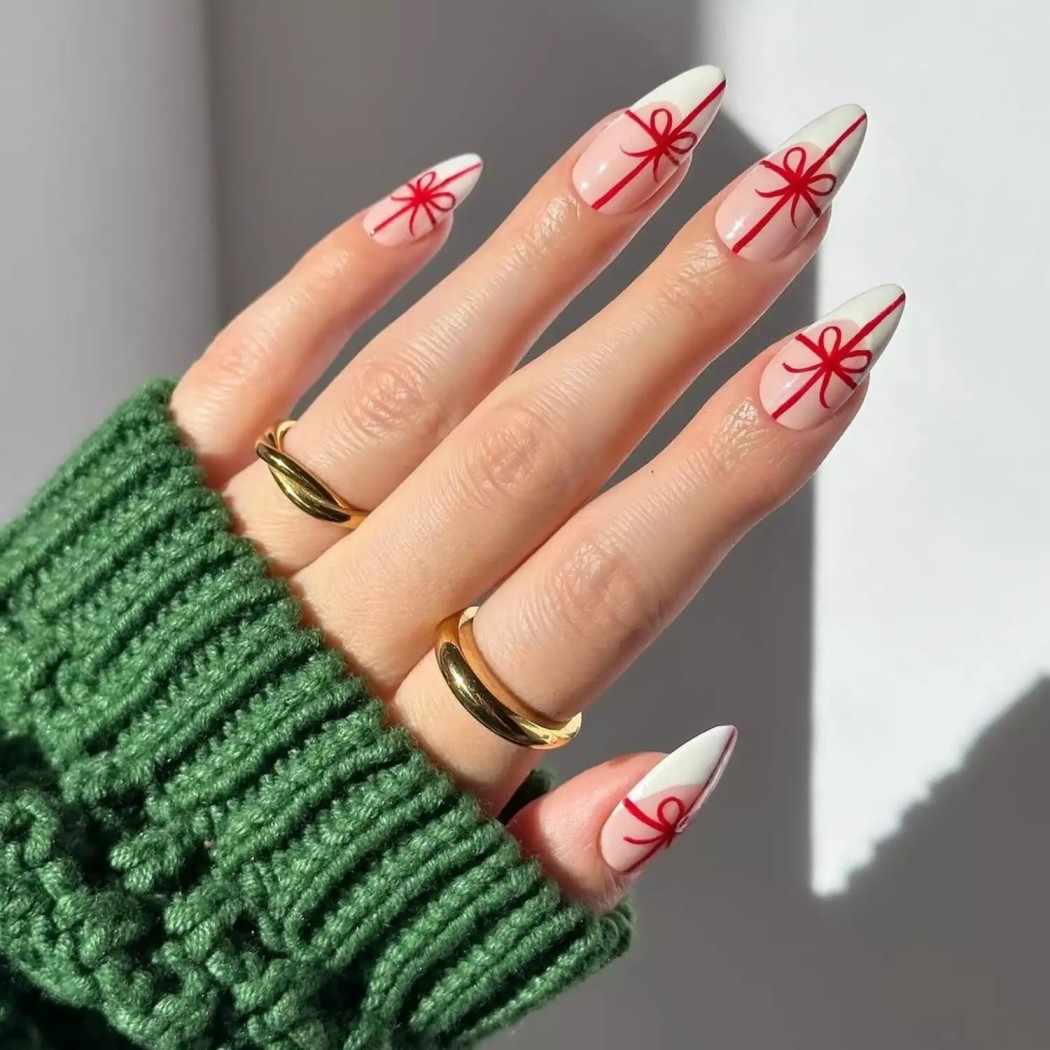
Gift-wrap bows make a charming December design, especially on a sheer, cream, or red base. The painted ribbons can run across the nail like wrapping paper, with a bow placed near the center or toward one side. You can decorate every nail, but a single bow on each hand often creates a balanced manicure with less effort. Use a solid coordinating color on the remaining nails to keep the design from feeling overly detailed.
A thin nail-art brush gives you control over the loops and ribbon tails. Paint a small cross first, then add the bow shape where the lines meet. If painting a symmetrical bow is difficult, a simplified outline or sticker can work just as well. Choose a high-contrast color such as red on a nude base, or use gold over a deep green polish for a more dressed-up effect. Let the design dry before adding top coat, since a heavy brushstroke can blur fine lines. This look pairs nicely with simple holiday accessories and doesn’t require a long nail length.
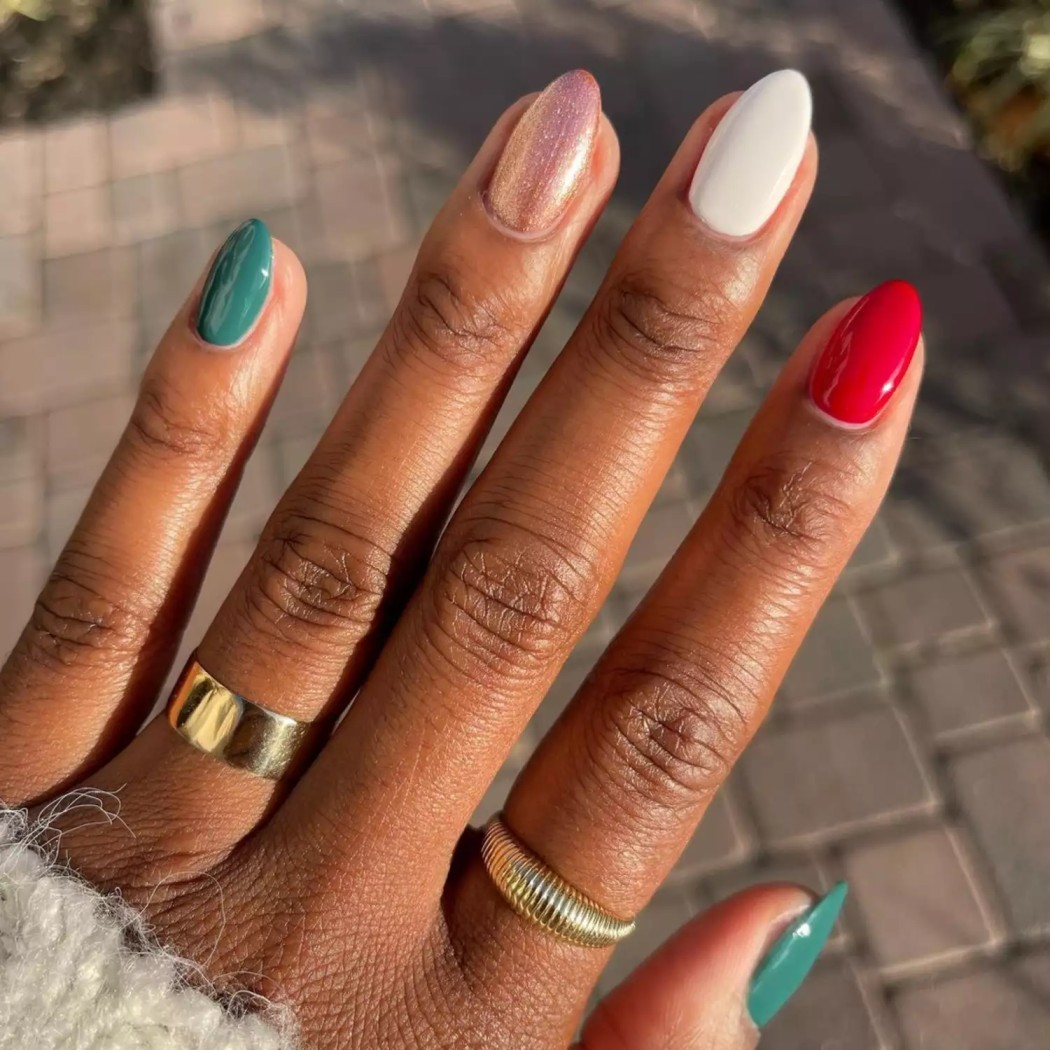
A Christmas Skittle manicure uses a different festive shade on each nail. Red, green, gold, and white make a familiar holiday palette, while blue, white, and silver offer a wintery alternative. The design is one of the easiest ways to make a colorful manicure feel coordinated: repeat the same colors on both hands or arrange them in a gradual pattern from light to dark.
Choose finishes that work together. You might combine glossy cream with metallic gold, or use all creams for a softer, less reflective result. If one shade is much more opaque than the others, apply thin coats and allow extra drying time to avoid smudges. You can add a simple accent, such as a dot or star, to one nail without turning the manicure into a detailed project. A Skittle manicure is especially useful when you want festive nails but don’t have the time or tools for intricate artwork. It also works well on short nails, since each color stands on its own.
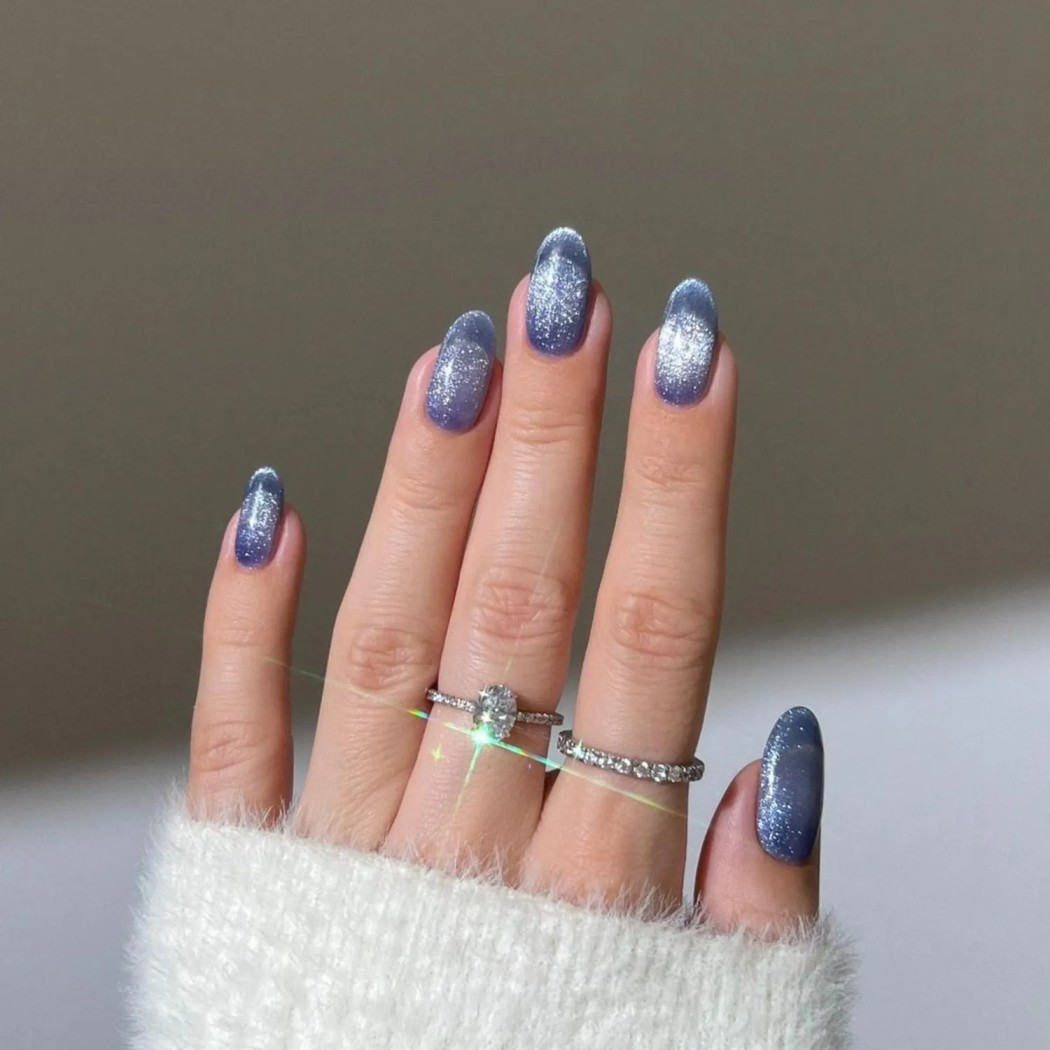
Icy blue velvet nails create a wintery, light-catching finish with magnetic polish. A French version uses the reflective effect across the nail and a contrasting magnetic detail at the tips. The result can look intricate, but the main visual interest comes from the polish, so you don’t need to add extra decorations. This makes the idea appealing if you want a statement manicure without painting individual snowflakes or ornaments.
Use a magnetic polish and the tool recommended for that formula. The appearance depends on how the particles shift while the polish is wet, so follow the product’s directions and work one nail at a time. To create a French effect, use a guide or a fine brush to define the tip, then position the magnet as directed. If the technique feels too advanced, apply the polish across the whole nail for a simpler velvet finish. A clear top coat may change how reflective the effect looks, so test it on one nail first if you’re unsure.
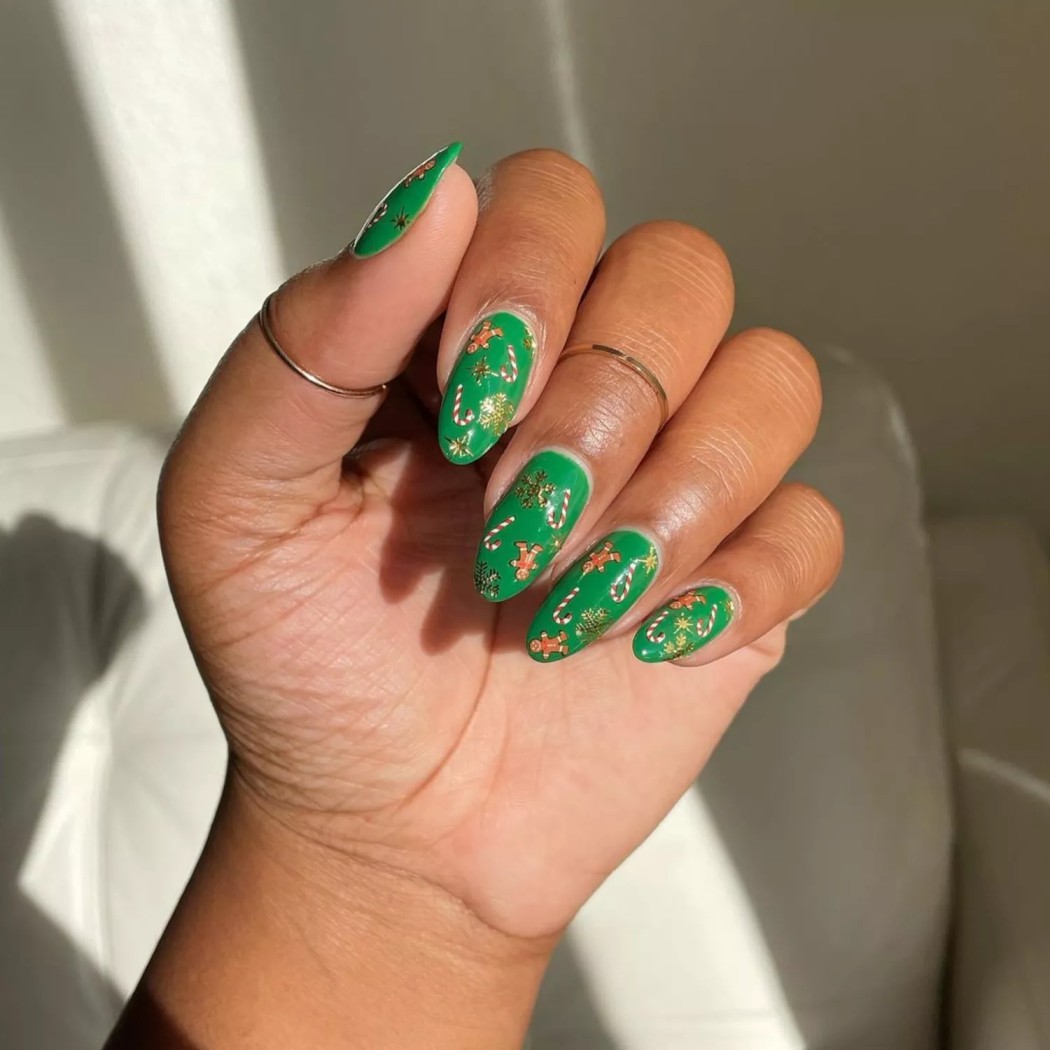
Gingerbread people, candy canes, stars, and other seasonal treats make a playful manicure. A bright green base gives the illustrations a vivid background, but cream or red can work just as well. Detailed characters can take time to paint freehand, so stickers are a practical shortcut. Use them on one or two accent nails and paint the rest in a solid color for a design that feels festive without requiring every nail to become a miniature scene.
If painting the art yourself, simplify each motif into a few recognizable shapes. A candy cane can be made from a curved line with alternating stripes; a gingerbread person can be outlined with a small brush and finished with tiny dots. Let the base coat dry completely before adding the details. Apply stickers according to their instructions, smoothing them down gently to reduce lifting at the edges. Seal the finished design with a clear top coat. Keep the stickers away from the very edge of the nail if you want them to last longer.
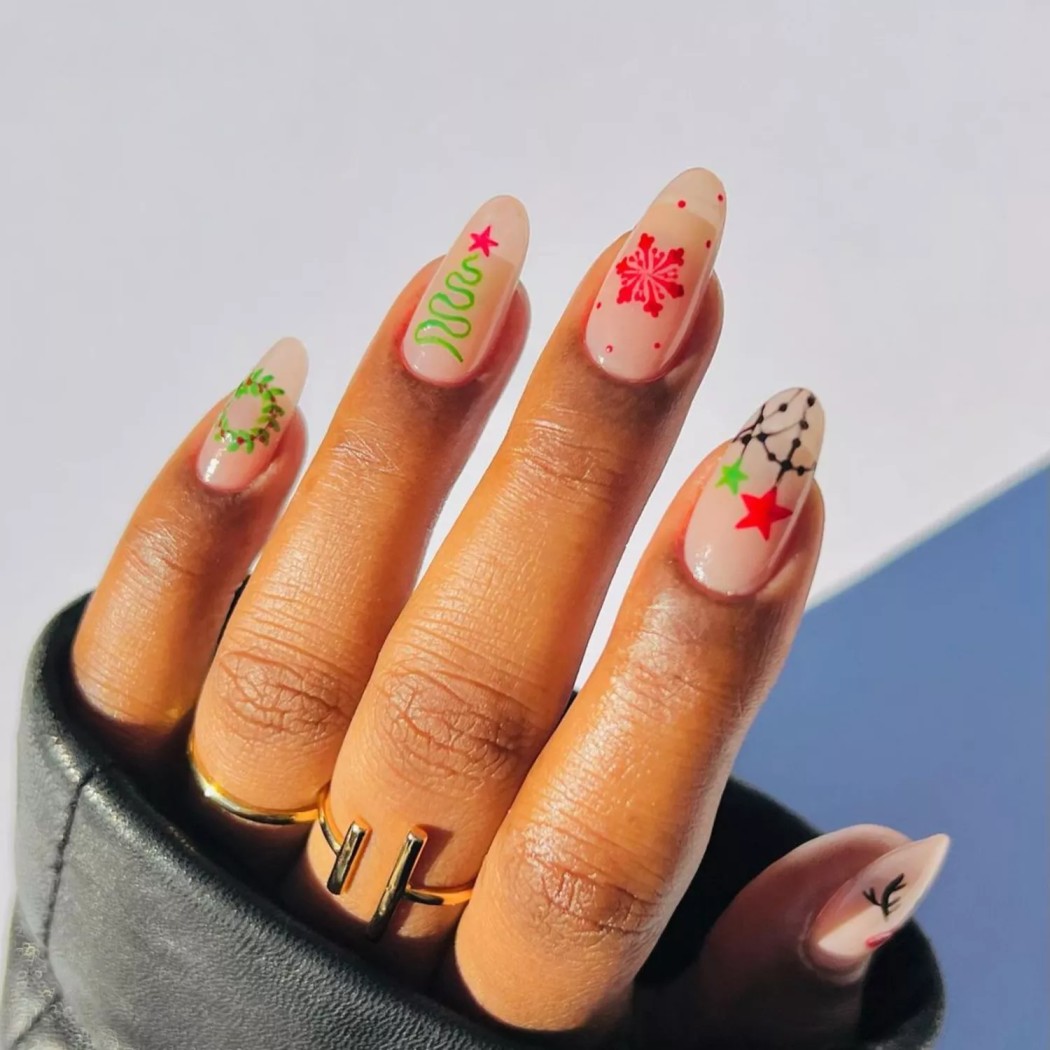
A vintage-inspired manicure can be made with simple dots and lines in red, green, black, and sheer nude. Rather than painting a detailed scene, use tiny stars, berries, ornaments, or abstract festive marks scattered across a neutral base. The limited palette gives the nails a collected, nostalgic feel while keeping the designs flexible enough to suit different outfits and occasions.
A dotting tool helps create berries, lights, and small ornament shapes. For thin lines, use a striping brush or a fine-tipped nail-art pen. You don’t need to decorate every nail equally: leave some with just a few dots or a single line to create breathing room. Stickers can stand in for hand-painted shapes if you want a faster result. On short nails, use fewer details and smaller motifs so the surface doesn’t look crowded. A glossy top coat enhances the colors, while a matte finish can make the palette look softer and more muted.
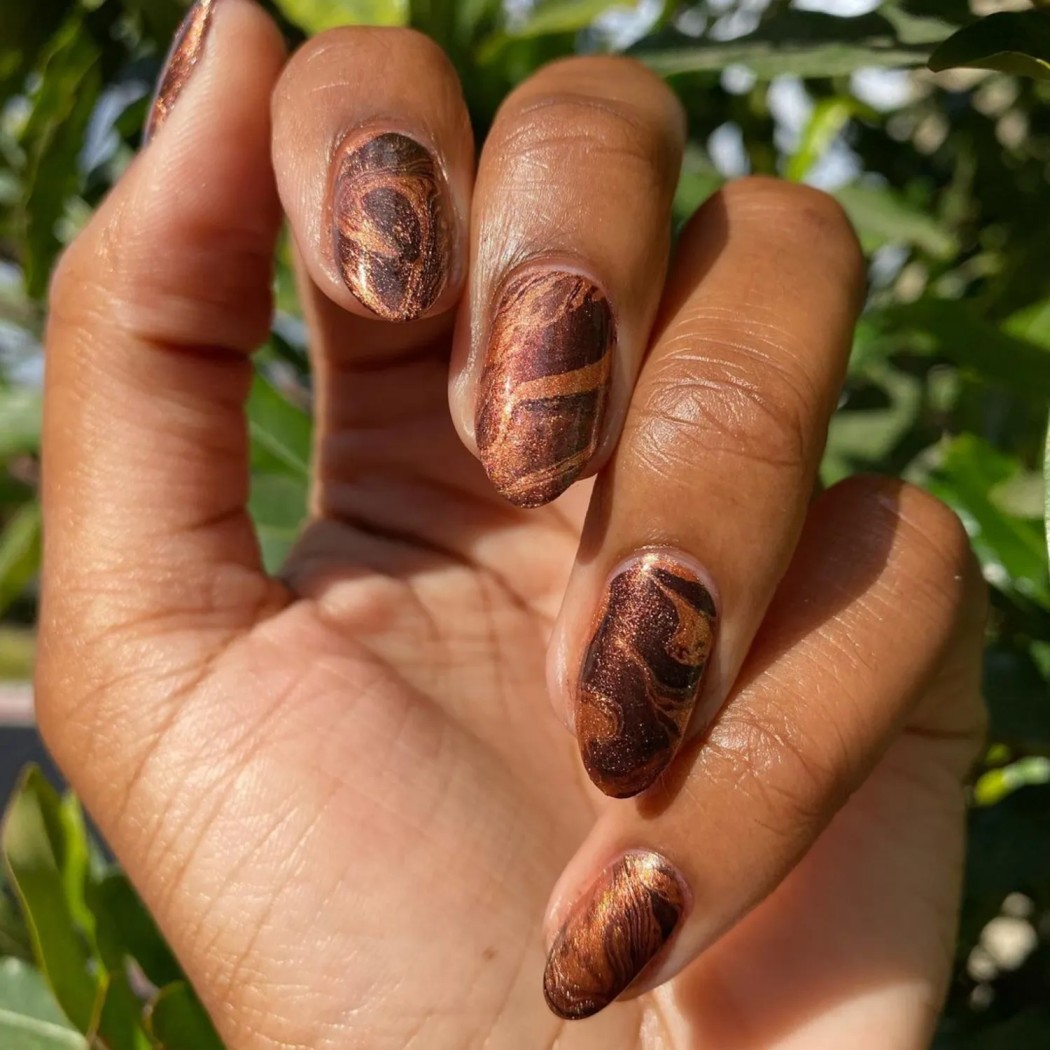
Chocolate marble combines espresso and copper tones in a swirled, stone-like pattern. The mix can feel festive without relying on traditional holiday colors, and it works particularly well as an accent alongside a solid brown, cream, or nude manicure. You can create the pattern directly on the nail or transfer blended polish with a cosmetic sponge. The direct method gives more control; the sponge can create softer, more diffused streaks.
Work quickly when combining the colors, since polish can begin to dry before you finish the pattern. Place a few small drops of each shade on a palette or foil and use a toothpick to gently swirl them, or add dots directly to the nail and blend lightly. Avoid overmixing, which can turn the colors into one muddy shade. Clean up the skin around the nail with a small brush and an appropriate remover, taking care not to flood the cuticle. Once the pattern is dry, add top coat to smooth the surface and bring out the metallic details.
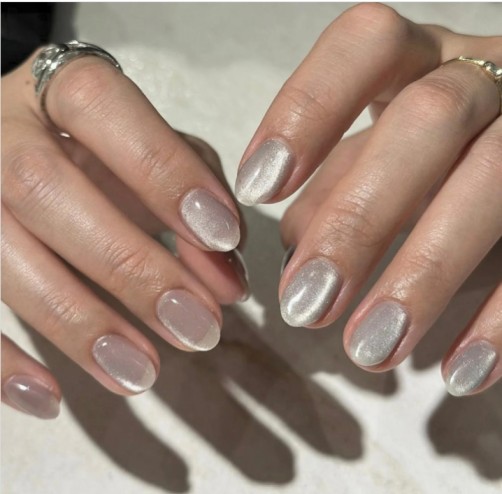
Silver cat-eye nails create a cool, reflective manicure that suits December parties and winter outfits. Magnetic polish gives the metallic particles a line or glow that shifts with the light, adding dimension without requiring extra nail art. You can wear the effect across every nail for a bold look or use it as an accent with solid silver, black, or sheer nude polish.
The exact result depends on the formula and magnet, so follow the product instructions rather than assuming every polish works the same way. Apply the product as directed and position the magnet while the polish is still workable. Try a narrow highlight for a clean cat-eye line, or move the magnet to create a broader, more diffused effect. If you’re using gel polish, follow the product’s curing directions and avoid skin contact with uncured gel. A top coat can change the way the reflection appears, so check the finish before completing the whole set. A single silver accent nail is an easy option if you prefer a quieter manicure.
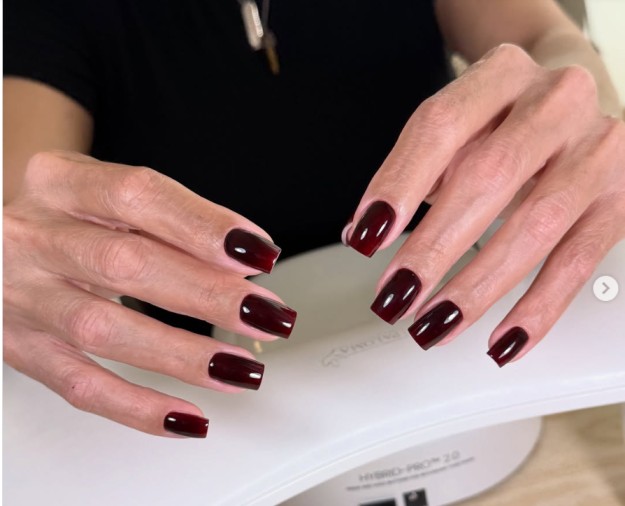
Burgundy jelly nails offer a translucent alternative to opaque wine polish. The sheer layers allow the color to build gradually, creating a glossy, syrup-like finish that can look rich without feeling visually heavy. Wear the shade on its own for a simple manicure or add a subtle design, such as dots, a thin French edge, or one tiny metallic accent. The jelly effect is especially noticeable when the polish is applied evenly in several thin coats.
Begin with a smooth base, then apply one thin layer and let it dry before adding another. This makes it easier to control how deep the color becomes. If you want the translucency to show, avoid applying too many coats. A sheer nude base can slightly soften the shade, while a clear base keeps the color more direct. Finish with a glossy top coat. If your natural nail has visible ridges, a suitable smoothing base may help create an even appearance, but avoid filing the nail surface aggressively. Burgundy jelly polish pairs well with winter knits and understated jewelry.
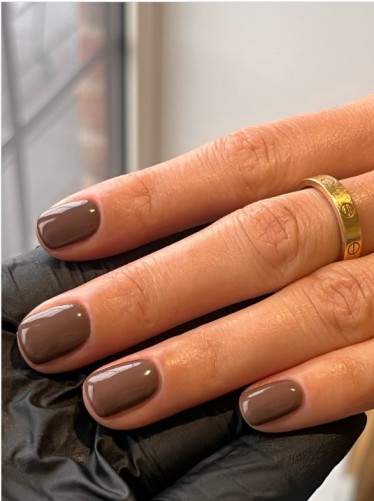
Chocolate brown is a versatile December nail color that can feel cozy and polished at the same time. Choose a deep espresso shade for a dramatic, glossy manicure, or a lighter cocoa tone for something softer. The color works well on its own, but it can also be paired with copper, cream, gold, or burgundy details. A single metallic line or a few gold dots are enough to make a plain brown manicure feel more occasion-ready.
For an even result, apply thin coats and allow each layer to dry according to the polish instructions. Dark shades can show uneven application more clearly than sheer colors, so take your time around the edges without painting onto the skin. A rounded or squared nail shape can both suit the color; choose the length and shape that are comfortable for your routine. If you want a simple at-home design, alternate chocolate brown with cream nails or add one marble accent. A glossy top coat emphasizes the depth of the shade, while matte top coat gives it a softer finish.
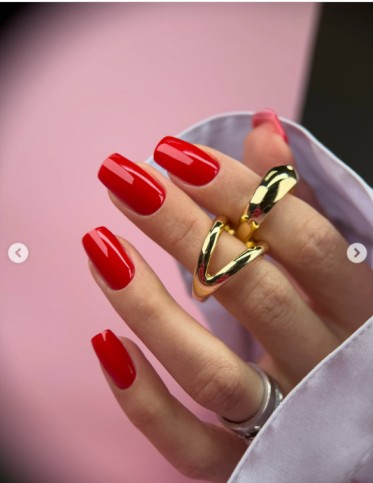
Classic red remains a straightforward choice for a December manicure. Bright blue-toned red feels crisp and vivid, while cherry, tomato, or deep wine shades offer different moods without changing the basic idea. Choose a shade that complements your skin tone and wardrobe rather than feeling obliged to match a particular holiday palette. A solid red manicure can be just as festive as detailed nail art, especially when you want something quick and polished.
Red polish can stain nails if applied without a base coat, so start with a protective base layer and follow the polish instructions. Apply thin coats for a smoother finish and clean up any polish on the skin before it dries. For a small twist, add a gold bow sticker, a white star, or a fine metallic French tip to one or two nails. If you prefer a low-maintenance look, a shorter rounded shape can help reduce snagging and make chips less noticeable. Finish with a top coat and allow enough drying time before getting dressed.
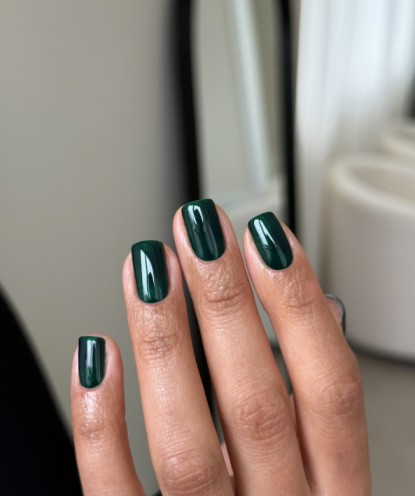
Deep forest green brings a rich, wintery feel to December nails. It works beautifully as a glossy solid manicure, but it can also anchor a plaid design with red, cream, or a fine metallic line. Compared with a brighter green, a deep shade may feel more understated and easier to wear beyond the holiday season. Use one accent nail for tartan-inspired stripes or keep every nail the same color for a simpler result.
For a plaid accent, apply a solid green base and let it dry before adding a few thin red and cream lines. Keep the pattern uncomplicated so it remains clear on the nail. If hand-painted stripes aren’t your thing, use a nail-art sticker or combine green and red as a Skittle manicure instead. Dark polish can make application marks more visible, so work in thin layers and clean up the edges carefully. A glossy top coat brings out the depth of the color; a subtle shimmer layer can add dimension without changing the classic palette.
Style Nexus is written and run by Matilda. What started as a personal interest in fashion, beauty, and everyday styling grew into this site a place to share outfit ideas, beauty tips, and style inspiration with anyone looking for a bit of direction on their own look.