
I’ve been doing my own nails and getting them done professionally for about six years now, and for the last three autumns I’ve kept a running note on my phone of every burgundy polish I try, what it actually cost, how long it lasted, and whether I’d get it again. I started that note after a specific disaster: I picked a burgundy shade off the little color chart taped to the salon counter, and by the time it dried under the lamp it looked almost brown-purple instead of the wine red I’d pictured. I wore it for two weeks anyway out of stubbornness. That note has saved me from repeating that mistake more times than I’d like to admit, and it’s the backbone of everything in this guide.
If you’re standing in a nail aisle or scrolling a salon’s color wall trying to dcide between “safe fall red” and something with more character, this is the guide I wish I’d had. Real shade advice by skin tone, real product names, honest notes on what each design actually costs and how long it holds up, and the mistakes I made so you can skip them.
Why Burgundy Keeps Winning Every Fall?
Burgundy isn’t one color. That’s the first thing worth understanding before you pick a bottle. It’s a family of shades that range from a berry-leaning red to something almost black, and the undertone (whether it pulls purple, brown, or true red) changes how it looks against your skin far more than most people expect.
It works so well for fall because it echoes the things we already associate with the season: wine, turning leaves, sweater weather, candlelight. It’s deep enough to feel seasonal but neutral enough to wear to a Tuesday morning meeting and a Saturday dinner without changing your polish in between.
What’s kept it relevant into 2026 specifically is how well it takes to different finishes. A matte top coat like essie’s Matte About You over a burgundy base looks almost nothing like the same polish in high gloss. Chrome powder, gld leaf, magnetic cat-eye polish, and glitter toppers like OPI’s Nail Envy line of finishing products all sit differently on burgundy than they do on brighter reds, which is part of why nail techs keep reaching for it season after season.
The combinations I’ve actually seen requested most, both for myself and while waiting in salon chairs watching other clients’ consultations, are:
- Burgundy with gold foil accents
- Burgundy with chrome powder finishes
- Fully matte burgundy
- Burgundy French tips over a sheer nude base
- Hand-painted florals on a burgundy background
- Cat-eye magnetic polish in wine tones
- Plaid detailing for flannel season
- Metallic copper as a burgundy-adjacent alternative
Finding Your Actual Shade, Not Just What Looks Good on the Cap:
This is the step most guides skip entirely, and it’s the one that determines whether you love your manicure or take it off in a week. Test polish directly on your nail bed under natural window light, not salon lighting, which tends to wash out undertones and make everything look more saturated than it is once you step outside.
- Fair skin tones: generally look best in cooler burgundy shades with berry or purple undertones, since they create contrast without overwhelming lighter complexions. Ask for something like OPI’s “Malaga Wine,” essie’s “Bordeaux,” or a raspberry-leaning berry shade.
- Medium skin tones: tend to come alive with warmer burgundies that lean toward brown or gold undertones. Merlot, cranberry, and a warm oxblood shade like OPI’s “Lincoln Park After Dark” all read beautifully here.
- Deep skin tones: carry the most saturated, high-pigment shades exceptionally well. Espresso-burgundy, true black cherry, and deep oxblood create the kind of contrast that photographs and reads as polished rather than flat.
None of this is a hard rule. I’ve broken every one of these more than once and still liked the outcome. Treat it as a starting point for a salon consultation, not a restriction.
Choosing a Nail Shape That Fits Your Actual Life, Not Just Pinterest:
I used to think nail shape was purely a style decision until I got a full set of stiletto nails the week before a project that required eight hours a day of typing. I learned quickly that shape is a lifestyle decision as much as an aesthetic one.
- Almond shape: is the most versatile and, in my experience, the easiest to keep looking neat between fills. It elongates the fingers and works with solid color, florals, chrome, and French tips equally well.
- Coffin shape: gives you the most surface area for detailed work. If you want plaid, gems, or layered glitter, this shape lets the design actually show instead of getting cramped near the tip.
- Oval shape: is the lowest-maintenance option here. It grows out cleanly, chips less at the edges in my experience, and suits a simple, minimal manicure well.
- Stiletto shape: is dramatic and, honestly, a geuine hassle for day-to-day tasks like typing, texting, and opening cans. It pairs beautifully with metallics and heavy texture for a specific event, but I wouldn’t recommend it as a everyday choice unless you’re used to it.
21 Burgundy Nail Designs Worth Trying This Fall:
Every design below includes what I’d actually tell a friend: how it wears day to day, roughly what to expect to pay at a salon, and whether it’s realistic to try at home.
1. Classic High Gloss Almond:
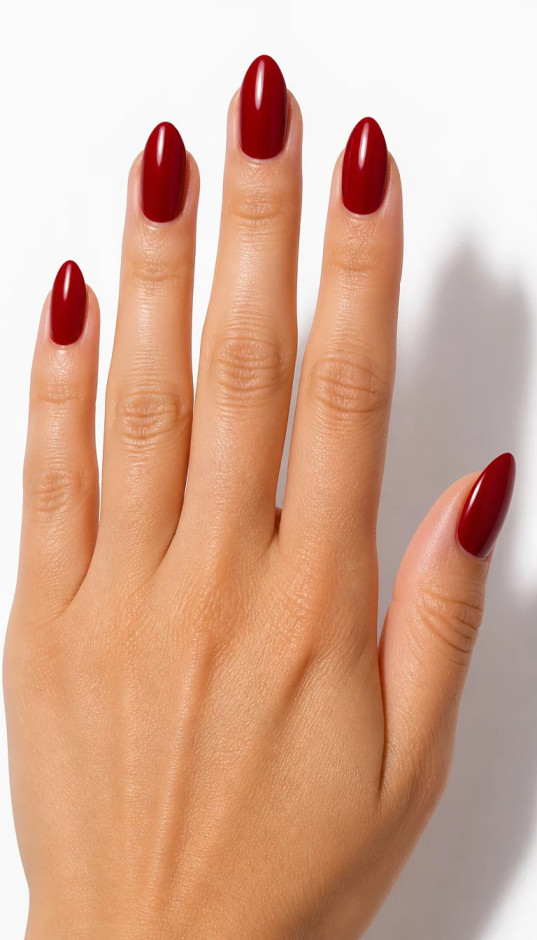
A rich, mirror-shine burgundy on an almond shape. I wore this exact combination to a wedding last year, using OPI’s “Malaga Wine” under a glossy top coat, and got more compliments than I did the month before with a full nail-art set. Salon cost typically runs $25-35 for a basic gel manicure in this style, and it’s genuinely one of the easier looks to replicate at home with a two-coat application and a quality top coat like Seche Vite.
2. Plaid and Glitter Coffin Transformation:

Hand-painted plaid lines over a burgundy base, with rhinestones and glitter on one accent nail. My set took just under two hours at the salon and cost around $65 with the detailing. This one is genuinely difficult to DIY well; thin, straight plaid lines require a fine detail brush and a steady hand, so I’d bdget for a professional application if you want it to look clean rather than smudged.
3. Artful Textured Collage:
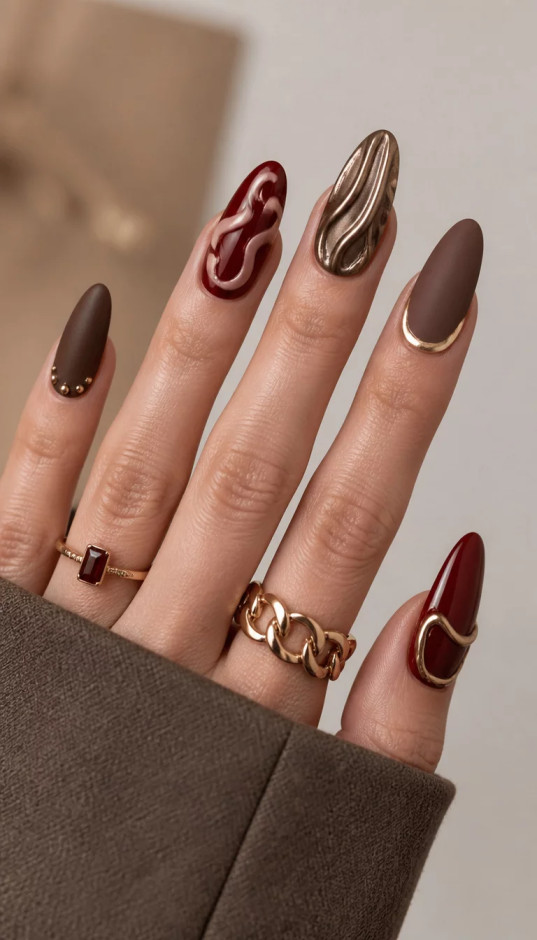
Sculpted 3D details, a matte-and-glossy contrast, and abstract swirls in warm neutrals over burgundy. This is a two-plus-hour salon appointment and typically the most expensive style on this list, often $70 and up depending on your local salon’s rates. Not realistic for a home manicure unless you already have acrylic sculpting experience.
4. Animal Print and Wavy Abstracts:

Leopard spots over deep burgundy with floral accents and wave detailing. Bolder than most looks here, so I’d recommend simple clothing and letting the nails stand out. Leopard print is more DIY-friendly than people assume: a small dotting tool and a steady wrist can replicate a rough version at home in under 30 minutes per hand.
5. Bronzed Copper Stiletto Glamour:
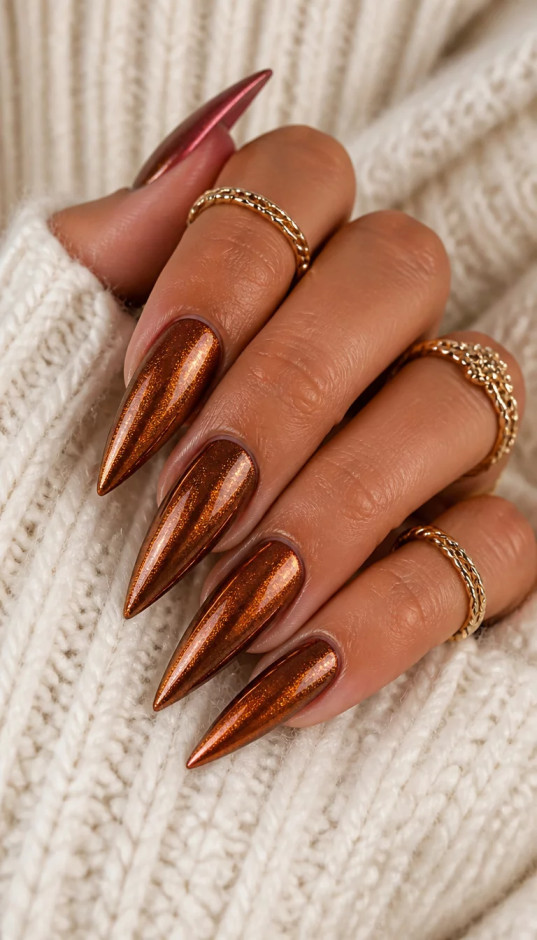
Metallic copper instead of straight burgundy, on a stiletto shape. This isn’t technically burgundy, but it sits in the same autumn palette and is worth including for anyone who wants a break from red tones while keeping the season’s mood. Salon application on stiletto shapes runs slightly higher than almond or oval due to the extra shaping time, usually $10-15 more.
6. Maple Leaf Matte Magic:

A velvety matte base using something like essie’s Matte About You top coat, decorated with hand-painted rose gold maple leaves. This is the design I get the most questions about in person, mostly because matte finishes photograph very differently than people expect from photos online. Budget an etra $10-15 for the matte top coat and hand-painted detail on top of a standard manicure price.
7. Golden Celestial Almond Dreams:

Gold stars, moons, and foil flecks over a glossy burgundy base. Reads like a night sky and works equally well with a cocktail dress or jeans. The foil application is fiddly but doable at home with a nail foil kit and a thin layer of foil glue; expect your first attempt to be messier than a salon version.
8. Cherry Blossom French Tips:

Burgundy tips with delicate hand-painted blossoms over a sheer nude base, a modern spin on the classic French manicure. Florals aren’t just a spring thing, and this one proves it. This is one of the more forgiving hand-painted designs to attempt yourself if you practice the blossom shape on paper first.
9. Gradient Scales and Gems:

An ombré fade from deep burgundy into black, layered with textured scale detailing and a few crystals. Genuinely dramatic and best saved for evenings out. Ombré blending takes practice with a makeup sponge technique; I’d recommend a salon visit the first time you try this look before attempting it solo.
10. The Eclectic Pattern Mix:

Leopard spots, zebra stripes, and tiny hand-painted cherries tied together with a shared burgundy gradient across the set. Sounds chaotic described in a sentence, but the shared color palette keeps it cohesive in person rather than cluttered.
11. Foxy Terracotta Autumn Art:
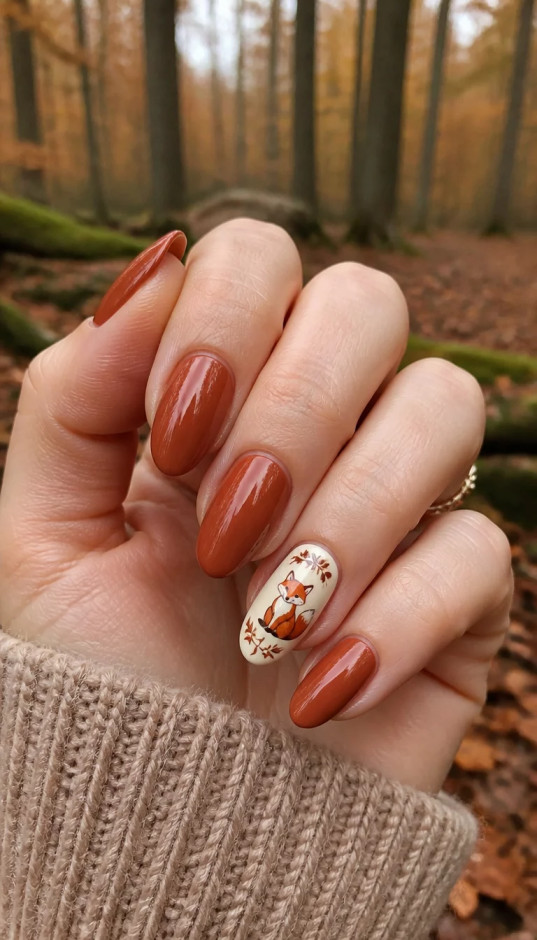
Warm terracotta paired with soft burgundy and a hand-painted fox on the accent nail. My pick for a pumpkin patch trip or a cozy weekend since it feels playful without tipping into childish. A single accent nail keeps the DIY version manageable even if you’re not confident free-handing an entire set.
12. Gold Leaf Burgundy Glitter:
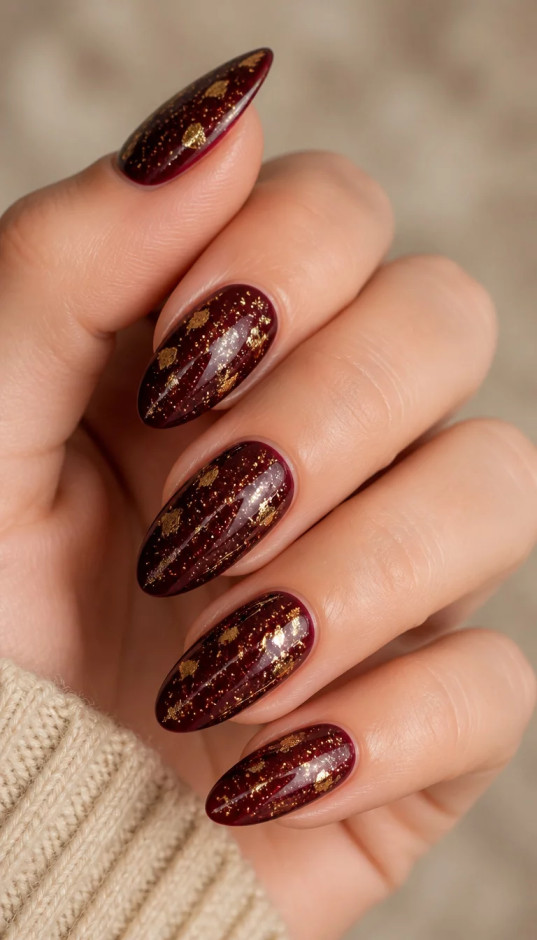
Genuine gold leaf pressed into a burgundy base with fine glitter woven through. A splurge design in both cost and time, typically the priciest option on this list after the textured collage style, but the one I’d pick without hesitation for a holiday party.
13. Polka Dot French Sophistication:
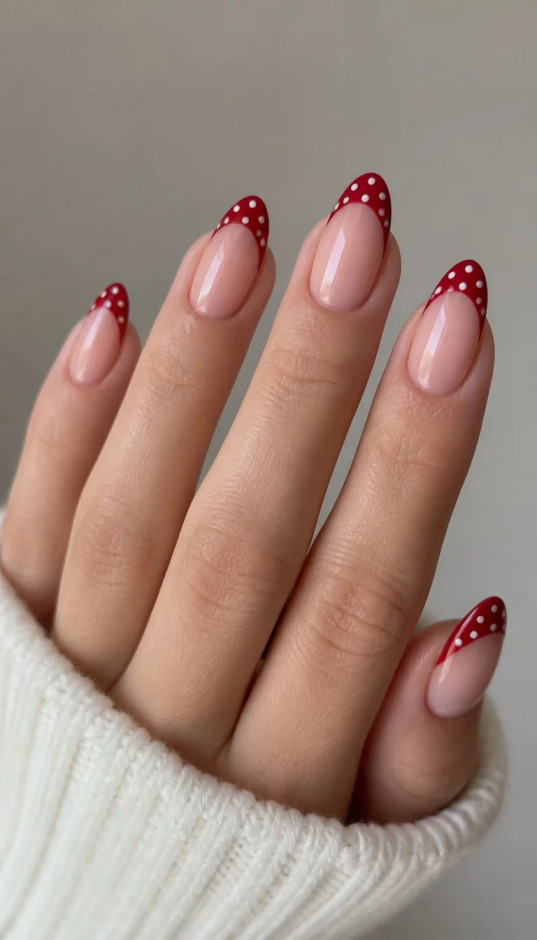
Burgundy tips with tiny white polka dots over a sheer nude base. Small detail, large visual impact, and low-maintenance enough for daily office wear. This is one of the easiest looks on this entire list to DIY using a simple dotting tool or the rounded end of a bobby pin.
14. Iridescent Purple Shimmer Talons:

A color-shifting finish that moves between burgundy, plum, and violet depending on the light, applied to a stiletto shape. This finish comes from a color-shifting or “chameleon” topcoat layered over a dark base and genuinely looks different every time you move your hand under different lighting.
15. Tiny Hearts and Pink Accents:
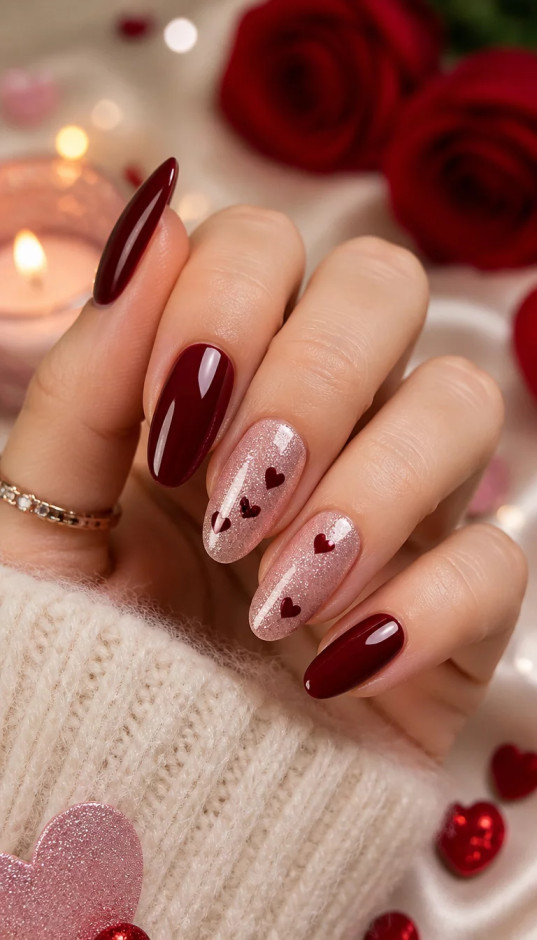
Miniature hand-painted hearts and glittery pink details layered over burgundy. A softer, more romantic take on the color, well suited to date nights or anniversaries. Small enough detail work that a fine striping brush and patience can get you a decent home vrsion.
16. Classic Nude to Red Gradient:
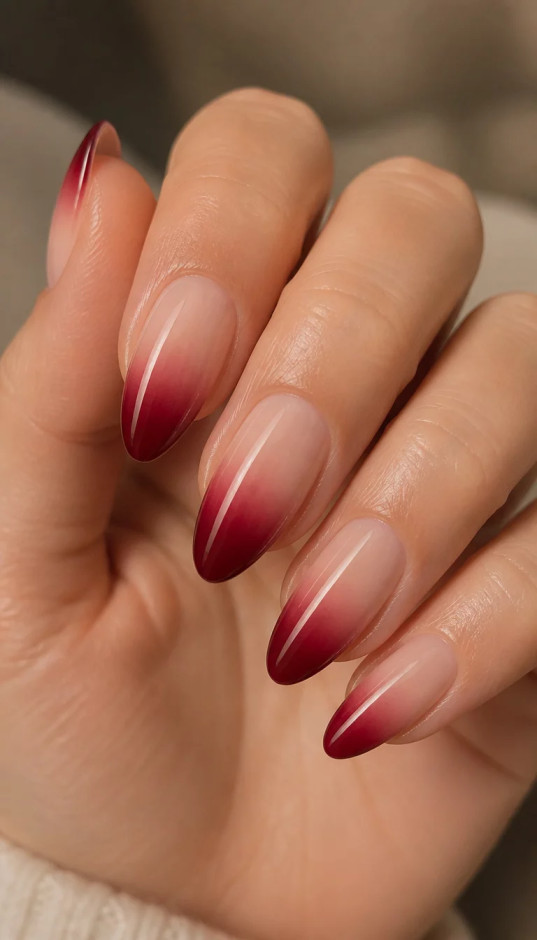
A soft ombré from nude into burgundy. Probably the single easiest design on this list to wear with any outfit, and a safe entry point if a fully dark set feels like too much of a commitment on your first try.
17. Chunky Glitter Burgundy Rings:

Oversized glitter particles suspended in a burgundy base, catching light like tiny gemstones. A great option for maximum sparkle without moving into full nail-art territory, and one of the more DIY-friendly looks since chunky glitter mixes are sold pre-made and simply layered over a base color.
18. Mismatched Polka Dot Playfulness:
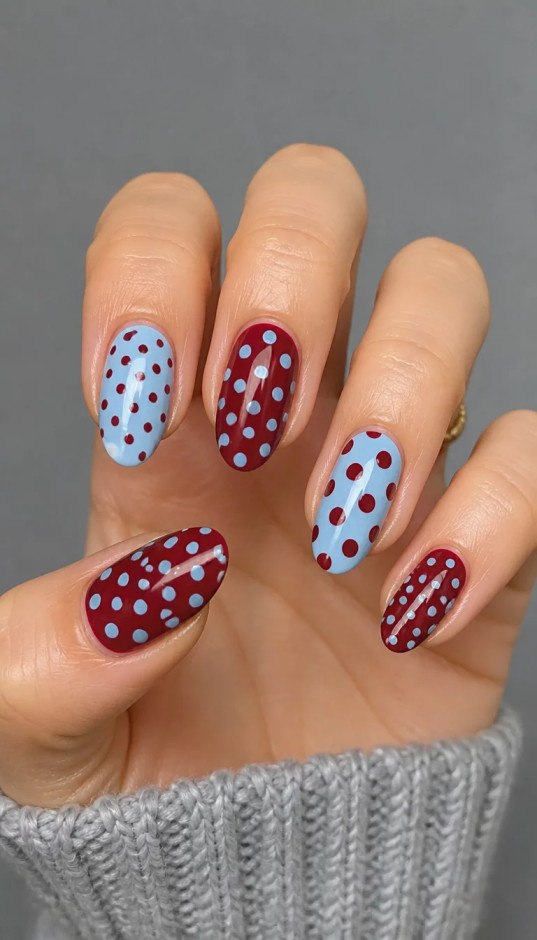
Burgundy paired with unexpected cool-blue accents and playful polka dots. A fun pick for creative workplaces or casual weekends where something slightly different from the standard fall palette feels right.
19. Metallic Cat Eye Magic:
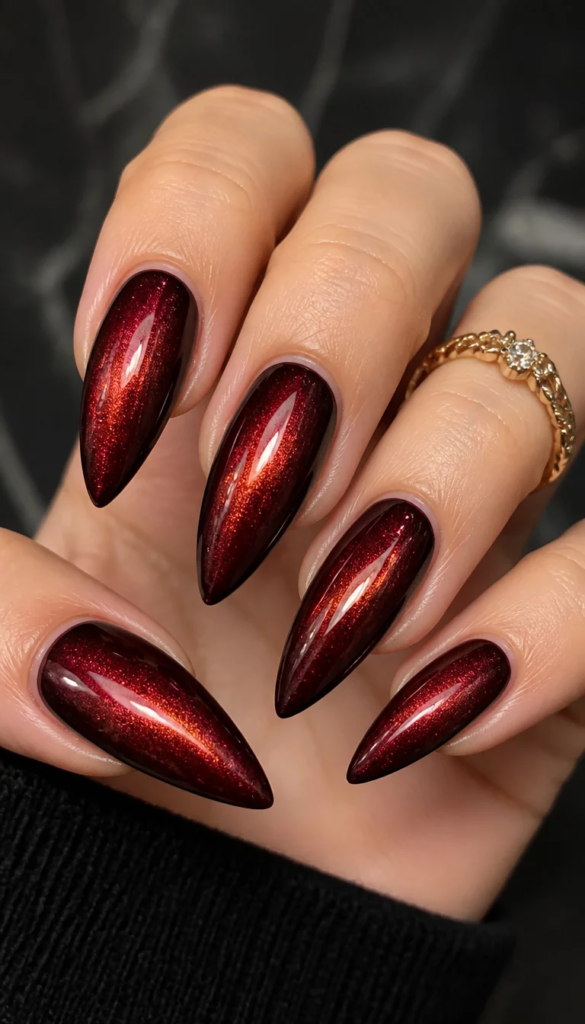
Magnetic polish creates a shimmering beam of light that shifts as your hand moves, using a magnetic top coat and a wand magnet hld over wet polish. One of the biggest requests I’ve seen at my regular salon this year, and it genuinely looks more expensive than the roughly $30-40 it typically costs.
20. Celestial Pink and Red Duo:
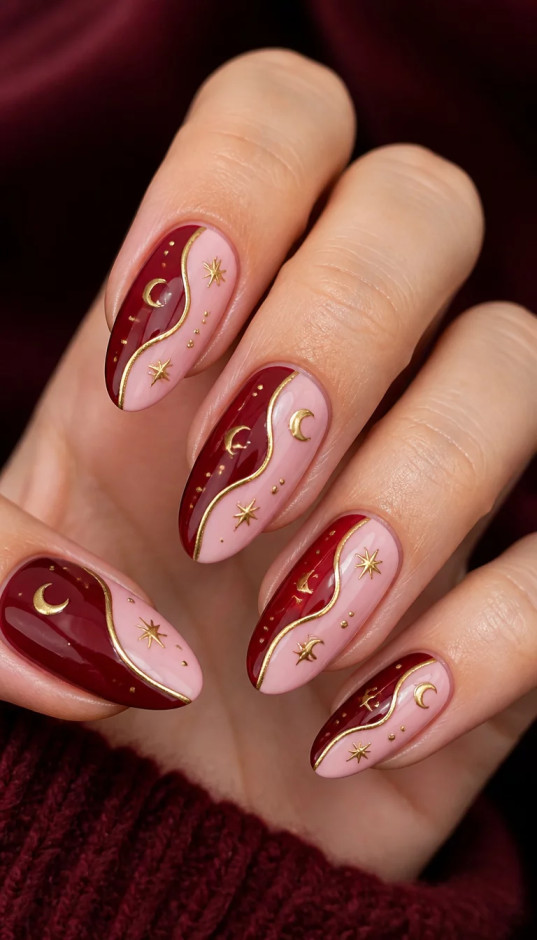
A softer take on celestial nail art, blending blush pink accents with burgundy and delicate gold stars. Balances the intensity of a full burgundy set nicely if you want something a touch more understated for daily wear.
21. Deep Berry Glossy Oval:
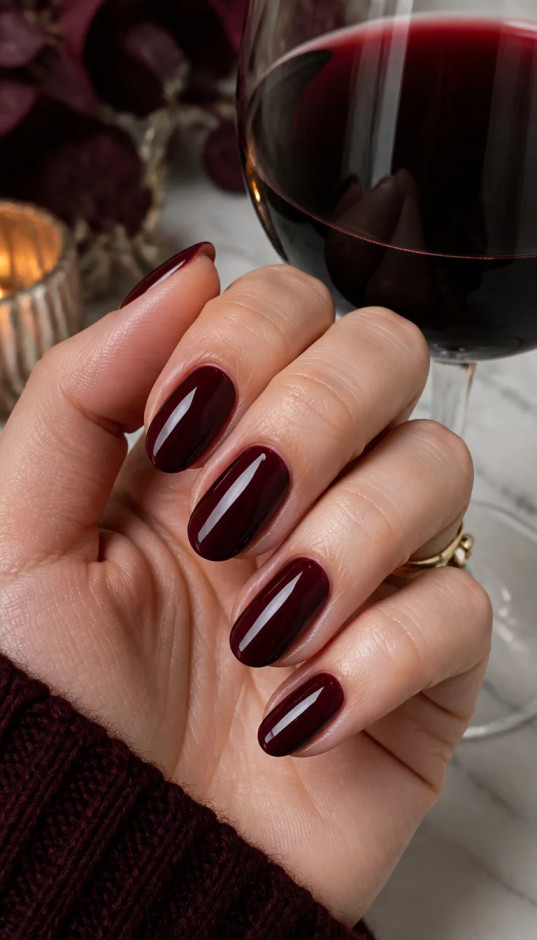
A rich berry shade that looks almost black indoors and reveals warm burgundy tones in direct sunlight. Simple, glossy, and one of the most versatile options here, this is the one I’d recommend first to anyone trying burgundy for the very first time.
How to Actually Make a Burgundy Manicure Last?
I used to assume chipping was just an unavoidable cost of darker polish. It turned out to be a handful of habits I wasn’t doing consistently.
Use cuticle oil daily, not just when you remember it exists: I keep a small bottle in my bag and treat it like hand lotion. Dry cuticles are the fastest way to make even a brand-new manicure look tired within days.
Wear gloves for anything wet: Dishes, gardening, cleaning products. I resisted this for years because gloves felt like an unnecessary step, and it turned out to be the single biggest factor in how long my polish actually lasted.
Refresh your top coat every two to three days: A thin new layer restores shine and adds a bit of extra protection without requiring a full redo.
Watch your exposure to hot water: Long baths or extended dishwashing sessions weaken polish adhesion over time and speed up lifting at the edges.
Take care of your natural nails underneath the polish: Strengthening treatments help. Resist peeling off gel polish yourself; it takes healthy layers of your natural nail with it every single time, and that damage is what causes the brittle, ridged nails people often blame on gel polish itself.
Mistakes I’ve Actually Made So You Don’t Have To:
- Picking a shade straight off the color chart instead of testing it on my own nail: Lighting and pigment behave differently once it’s actually on your skin. Test first whenever you can.
- Skipping proper prep on a DIY manicure: I rushed one once and skipped buffing entirely. It chipped within two days. Prep isn’t optional; it’s most of the actual work behind a manicure that lasts.
- Cramming too many elements onto one set: I once asked for plaid, glitter, gems, and a French tip all on the same hand. It read as busy rather than intentional. One or two focal elements per set tends to look far more deliberate.
- Neglecting my hands while obsessing over my nails: Dry, rough hands make even an expensive manicure look neglected. Moisturize daily, especially once the weather turns cold and dry.
- Choosing a design because it was trending rather than because I actually liked it: The manicures I’ve felt most confident wearing were never the ones I picked purely because everyone else had them that season.
Questions I Get Asked About Burgundy Nails a Lot:
Is burgundy still worth wearing for fall 2026?
Yes. It’s stayed popular because it’s flattering across skin tones and works with nearly everything already in most people’s closets.
What nail shape pairs best with burgundy?
Almond and oval are the most versatile, lowest-maintenance choices. Coffin and stiletto give more surface area for detailed art if that’s the direction you want to go.
Can burgundy nails work for a formal event?
Yes, and it tends to read as more sophisticated than a bright red, which is exactly why it shows up so often for weddings, office settings, and holiday parties alike.
What colors pair well with burgundy?
Gold, rose gold, cream, nude, black, terracotta, forest green, blush pink, copper, and chocolate brown all pair well.
How do I make burgundy polish last longer?
A strengthening base coat, thin even layers, a quality top coat refreshed every couple of days, daily cuticle oil, and gloves during household chores.
Can I do a burgundy manicure at home, or do I need a salon?
It depends on the design. Solid color, simple gradients, and dot work travel well to a home manicure with basic tools. Fine detail work like plaid lines, 3D sculpting, and precise gold leaf placement is genuinely difficult to get clean without professional tools and practice, so those are worth booking a salon appointment for, at least the first time.
How much does a burgundy manicure typically cost?
In my experience, a basic solid-color gel manicure runs roughly $25-35, while detailed nail art with hand-painting, foil, or gems can run $50-80 depending on complexity and your local salon’s pricing.
How long does a burgundy gel manicure usually last?
With proper aftercare, I typically get two to three weeks out of a gel manicure before noticeable regrowth or lifting, though this varies based on how fast your nails grow and how hard you are on your hands day to day.
Final Thoughts
What I keep coming back to with burgundy is that it never asks too much of you. It works on a simple oval shape just as well as it does on an elaborate coffin set covered in gems and gold leaf. You can wear it to work on a Monday and to a holiday party on Saturday without it ever feeling out of place.
If you’re not sure where to start, don’t overthink it. Pick one shade that actually suits your skin tone using the guidance above, try it in a shape you’re cmfortable maintaining day to day, and build from there. Add the glitter, the chrome, or the hand-painted details later once you know you genuinely enjoy wearing it. That’s exactly how I started three years ago with a single bottle of “Malaga Wine,” and I haven’t gone back to a plain fall red since.