
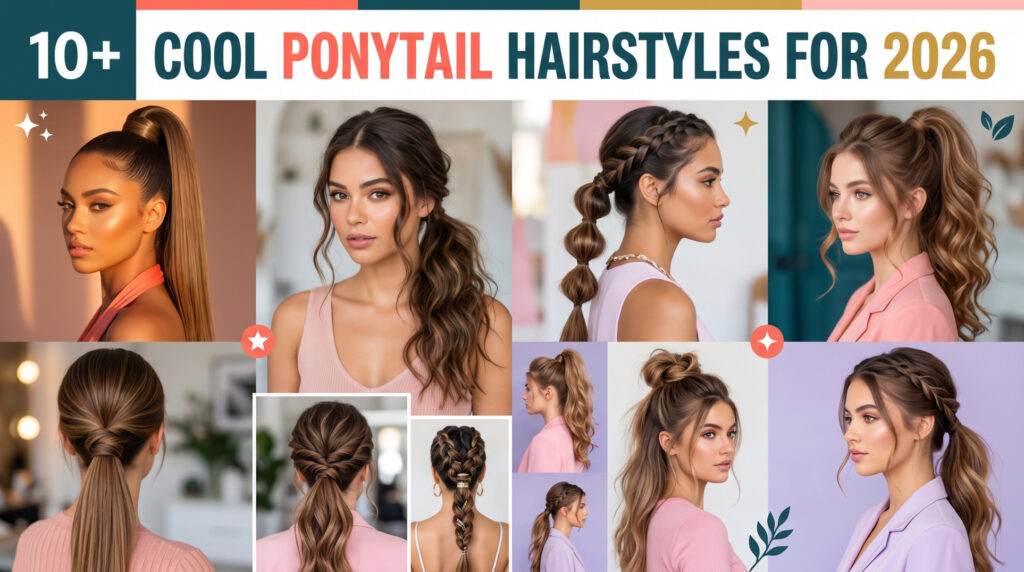
I used to think ponytails were a “lazy day” hairstyle. The thing you throw your hair into when you’re running late and don’t have time to think. Then three years ago I sat in a chair at a salon on a Tuesday afternoon, half asleep, watching my stylist wrap a two-inch section of my hair around the elastic instead of just yanking it into a plain black hair tie like I always did. She used a dab of Oribe’s Royal Blowout heat styling spray first, and it took her maybe fifteen extra seconds. I remember staring in the mirror afterward thinking, that’s the same hairstyle I do every single morning?
That fifteen seconds sent me down a rabbit hole. I strted paying attention to how the ponytail on the bride at my cousin’s wedding last September looked nothing like the one I threw my hair into for a 6am gym session that same week, even though technically they’re both “just a ponytail.” I bought a pack of spiral hair ties off Amazon because three separate hairstylist accounts I follow kept mentioning them. I ruined two inches of hair with a curling iron because I skipped heat protectant one lazy Sunday. I tried, and mostly failed, to recreate a bubble ponytail I saw on TikTok four times before I got the spacing right.
So here’s the full rundown, thirteen ponytails, in the order I’d actually recommend trying them, with the specific mistakes and product names attached so you don’t have to burn through the same trial and error I did.
Why I Keep Coming Back to Ponytails?
It comes down to effort versus payoff. Most of what’s below takes me somewhere between five and eighteen minutes start to finish, and several of them survive a full workday, a workout, and dinner afterward without a single touch-up.
A few reasons ponytails keep earning a spot in my weekly rotation:
- They hold up on pretty much any texture. I’ve done these on my own fine, straight hair and on my sister’s tight curls, and both looked intentional, not just “pulled back”
- They scale from gym-casual to dinner-reservation depending entirely on finishing touches
- They keep hair off your neck in humidity without looking like you gave up on styling altogether
- A change of accessory changes the whole read. A plain black elastic versus a silk scrunchie from Slip versus a pearl barrette from Lelet NY are basically three different hairstyles built on the same base
What Actually Makes a Ponytail Last (Lessons From a Lot of Slipping Ponytails)?
For roughly the first year I took ponytails seriously, mine kept sliding loose by 2pm without fail. I assumed my hair was just too fine for this to work. Turned out the problem was my prep, not my hair.
Texture matters more than people tell you: Fresh-washed hair is too slippery to grip an elastic properly, mine especially. I now either style on day two, or I run a lightweight texturizing spray (I use Living Proof’s Full Dry Volume Blast) through dry strands before the elastic ever touches my head. It gives the hair tie something to actually catch onto instead of sliding.
The elastic itself changes everything: I used thin drugstore rubber bands for years and they snapped constantly, usually mid-afternoon, usually in public. Switching to a spiral hir tie was one of those changes that felt embarrassingly overdue once I finally made it. Silk scrunchies and fabric-covered elastics work well too, and they’re gentler on the hair shaft, which matters more the more often you’re doing this.
Flyaways are fixable, not just something to live with: A pea-sized amount of pomade smoothed over the crown, followed by a light pass of a flexible-hold hairspray (Kevin Murphy’s Session Spray is the one currently sitting on my bathroom counter), has saved more ponytails than I can count. Go easy on the hairspray, though. Too much and it stops looking sleek and starts looking crunchy.
Volume comes from the crown, not the elastic: Teasing the crown slightly before tying it up, or backcombing the ponytail itself once it’s secured, makes a noticeably fuller finished look. For a long time I skipped this because teasing felt like a “special occasion” step. It takes thirty seconds and makes an average Tuesday ponytail look like you planned it.
Placement Changes the Whole Mood, More Than I Expected:
This is the part that genuinely surprised me. The exact same ponytail, moved two or three inches up or down, reads completely differently on camera and in person.
- High ponytails feel energetic and a little youthful, and this is what I reach for before workouts or when I want a subtle lifted look for a night out.
- Mid ponytails are my daily default. They land in that sweet spot between “I tried” and “I didn’t try too hard,” which is exactly what most office days and errand runs call for.
- Low ponytails read as more grown-up and polished to my eye. These are what I wear to meetings I actually care about, or to weddings, since they photograph cleanly against a structured dress or blazer.
Matching Ponytail Placement to Your Face Shape:
Placement isn’t only about mood, it also interacts with face shape in a way most guides skip over:
- If you have a round face, a higher ponytail with some height at the crown tends to elongate the look, while a low, flat ponytail can emphasize width.
- If you have a square or angular jaw, a slightly lower, softer ponytail with loose face-framing pieces softens the sharper lines rather than pulling everything tight and severe.
- If you have a longer or oval face, you have the most flexibility here, and mid to low placements tend to look the most balanced.
- If you have a heart-shaped face, wispy face-framing strands paired with a mid or low pony help balance a narrower chin against a wider forehead.
None of this is a hard rule. It’s a starting point if you’ve tried a style and it just didn’t feel like “you” for reasons you couldn’t quite name.
Ponytails for Every Hair Type:
I’ve tested these across different hair types with friends and family over the last couple of years, so here’s the honest version, not the generic one.
Fine hair, like mine, genuinely benefits from texture spray and light crown teasing, it fakes volume that isn’t naturally there. Thick hair barely needs that step, a smooth polished finish already reads as dense and healthy on its own. Curly and coily hair looks especially good in brided or twisted ponytails, since the braid keeps things controlled while still letting your natural curl pattern show through at the ends. And if your hair is on the shorter side, don’t count yourself out, mini ponytails and half-up styles work on shoulder-length hair better than most people expect.
Now, the styles themselves.
1. Tousled Ponytail:

My go-to for beach days and lazy weekends, and honestly the one I default to when I’ve slept nine hours and don’t want to look like I tried.
How to get it:
- Rough-dry your hair or work with second-day texture
- Tease the crown lightly with a fine-tooth comb
- Gather into a mid-height ponytail, keeping it loose rather than tight
- Pull a couple of face-framing pieces free
- Finish with a sea salt spray scrunched through the length
Best for wavy or thick, medium-to-long hair. I wear this to brunch, on vacation, and basically any time I want to look like I didn’t try.
2. Boho Knotless Ponytail:
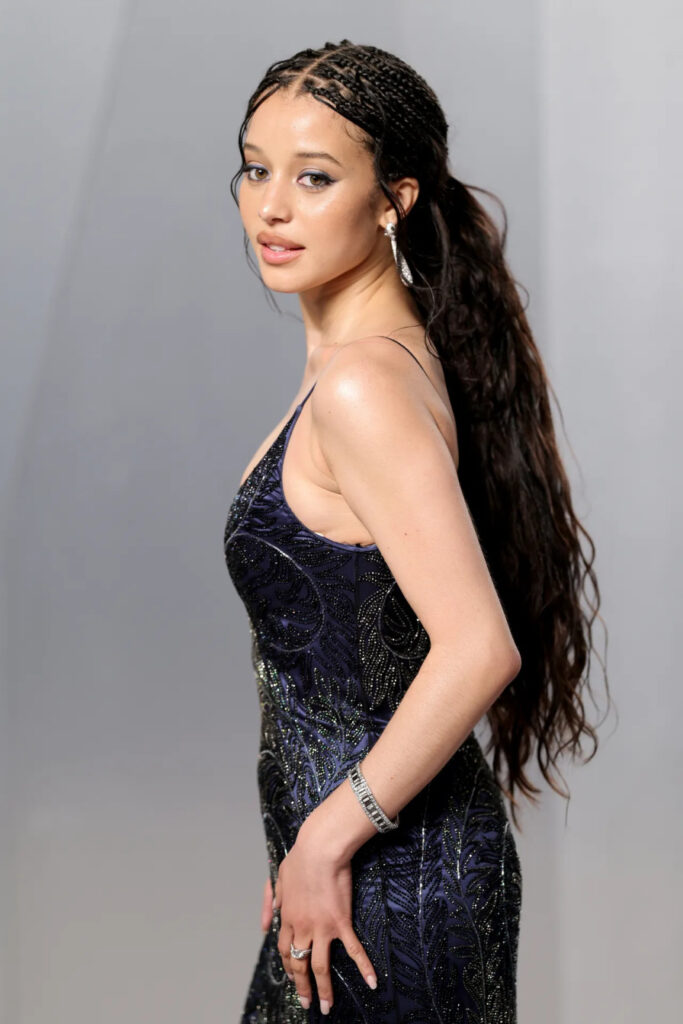
A favorite among a few friends of mine who wear knotless braids and box braids as a protective style. Gather the braids with a satin scrunchie, since a regular elastic will fray the braid ends within a day. Wrap two or three braids around the base to hide the tie completely, then leave the scalp and lengths lightly oiled with something like Mielle’s rosemary mint oil so they catch light instead of looking dull. This one holds up especially well for festivals, summer travel, and everyday wear where you need low maintenance for days at a time.
3. Power Ponytail:

This is the one from that salon chair I mentioned in the intro.
How to get it:
- Blow-dry hair fully smooth using a paddle brush, or straighten with a flat iron
- Apply a smoothing serum bfore drying, not after, this is the step most people skip and it makes the biggest visible difference
- Pull hair back tightly and secure at your preferred height
- Wrap a two-inch section of hair around the elastic and pin the end underneath
- Set the edges with a boar-bristle brush and a light mist of hairspray
Best for straight or thick, medium-to-long hair, and this is what I reach for before work presentations or formal dinners when I need to look put together fast.
4. Half Ponytail:
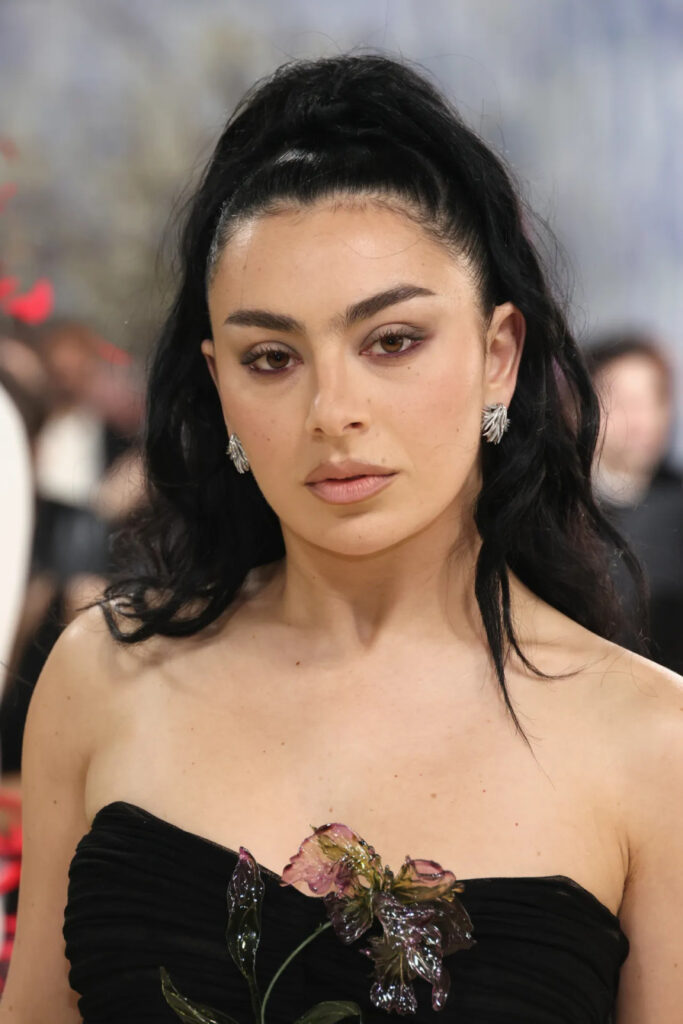
Probably the style I’ve worn the longest without ever getting bored of it. Only the top section gets pulled back and clipped, the rest stays down, so you keep visible length while still getting hair off your face. Twist the two side sections before clipping them up for a slightly more finished look without any real extra effort. This one works for nearly every hair type and is what I wear for school runs, coffee dates, and regular workdays where I want something between “done” and “not trying.”
5. Braided Ponytail:

How to get it:
- Brush hair thoroughly to remove all tangles before gathering it
- Secure into a ponytail at your preferred height
- Divide into three sections and braid to the end
- Secure the tip with a small clear elastic
- If your hair is fine, gently tug eah braid section apart with your fingers for a fuller look, tight braids can otherwise look thin
A light hairspray afterward keeps flyaways down without flattening the texture. This one’s my pick for gym sessions, travel days, and anything active.
6. Curly Ponytail:

Smooth roots against bouncy curls, that contrast is the whole point of this style. Smooth the base with a lightweight gel and a fine-tooth comb, then define the curls in the ponytail itself with a curl cream or mousse, DevaCurl’s Supercream is the one I keep coming back to. Diffusing while drying keeps curls defined and frizz down more than air-drying does. Save this one for date nights and holiday parties, since it takes a bit longer than the others to get the base smooth without disturbing curl pattern.
7. Bubble Ponytail:
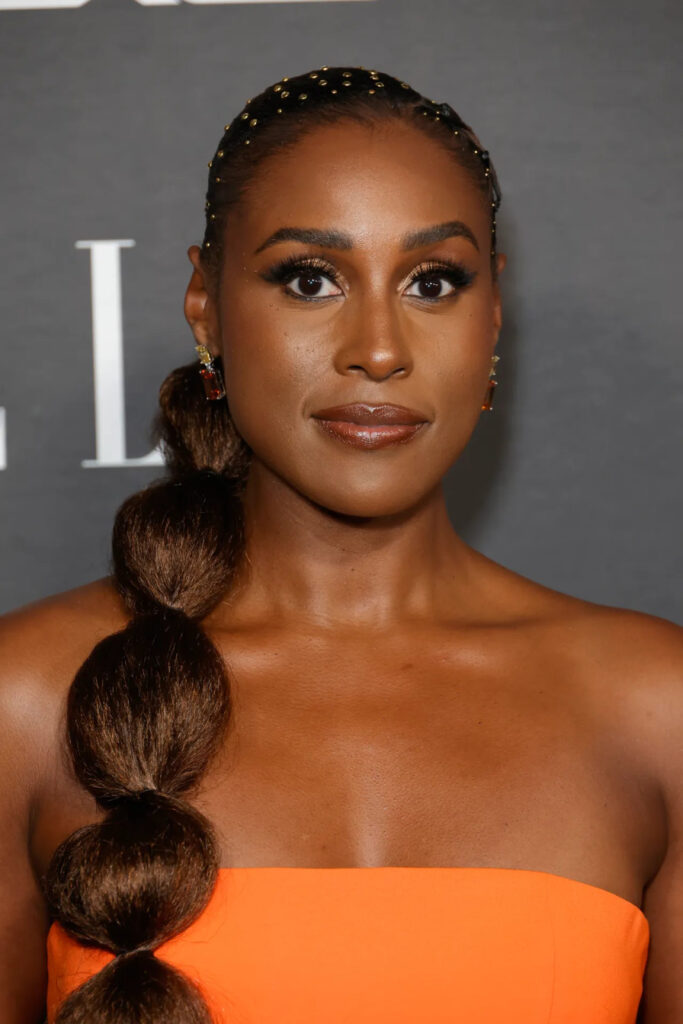
This gets the most compliments out of anything on this list, and it took me four attempts to get right, which is more than I expected for something that looks this simple.
How to get it:
- Gather hair into your base ponytail
- Add a second elastic about two inches below the first
- Continue adding elastics every two inches down the length
- Starting from the top, gently pull each section outward and downward to create a rounded “bubble”
- Repeat evenly down the whole ponytail, adjusting each bubble until they’re roughly the same size
Space the elastics evenly and take your time on step four, rushing it is exactly where I went wrong the first three times. Best for thick or medium-to-long hair, and a strong pick for birthdays and festivals.
8. Twin Ponytails:

I was skeptical this would read as too young on an adult, but styled correctly, it doesn’t. Positioned low near the ears, it feels more grown-up, positioned higher, it leans playful. Soft waves or curtain bangs keep it from tipping into costume territory. Wrapping a small strand of hair around each elastic gives it a noticeably more polished finish than a bare elastic does. This is what I wear to concerts and casual weekend outings, less often to anything formal.
9. Wispy Ponytail:

The opposite of a tight, sleek pony, here you want soft and slightly undone, with loose pieces framing the face. Keep it low at the nape and resist the urge to pull it tight. Use only a small amount of styling cream, too much weighs down the wispy effect entirely. Best for fine, straight, or wavy hair from shoulder length and up, and my pick for weddings and garden parties where “romantic” is the goal rather than “polished.”
10. Polished Low Ponytail:

Smooth, glossy, secured low at the nape, this one reads as put-together even on days I very much am not. Apply a lightweight serum first, smooth everything back with a boar-bristle brush, and leave one strand loose near the face for a slightly softer edge if you want it. Finish with a shine spray and smooth any last flyaways using a clean spoolie brush lightly coated in hairspray. Best for straight, thick, or fine long hair, and reliable for work meetings, formal dinners, and bridal events.
11. Barrette Ponytail:
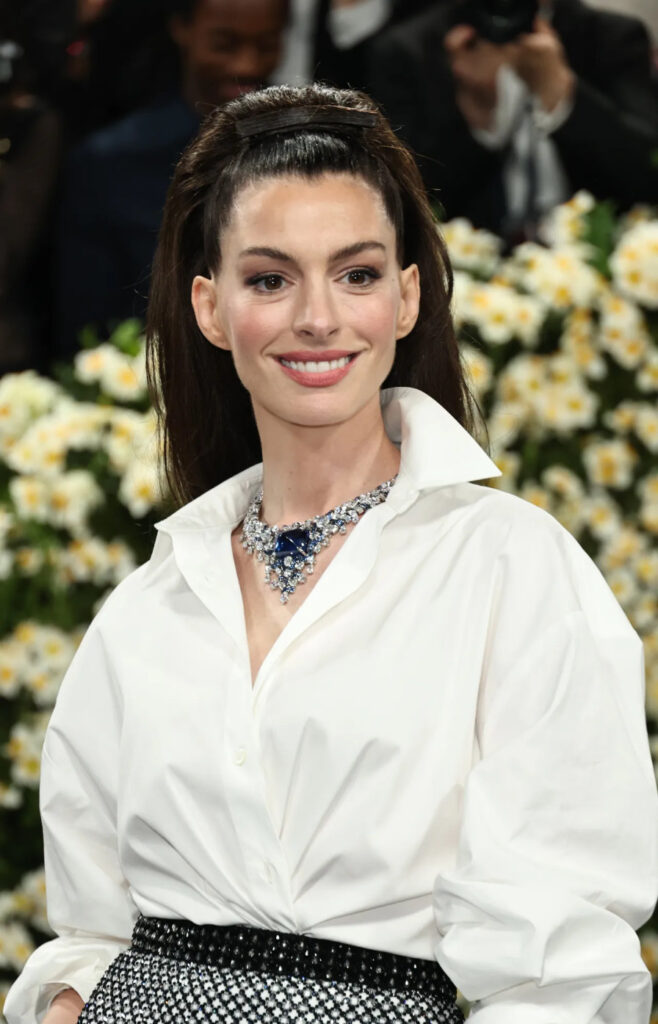
All you need here is one good accessory. Smooth the roots, gather into a high or mid ponytail, loosen it slightly by hand for volume, then clip a decorative barrette directly over the elastic. Pearl clips lean romantic, gold or silver barrettes lean timeless, choose based on the outfit rather than what looks cutest on its own. Good for dinner dates, holiday parties, and weddings where you want one clear focal point.
12. Mini Ponytail:
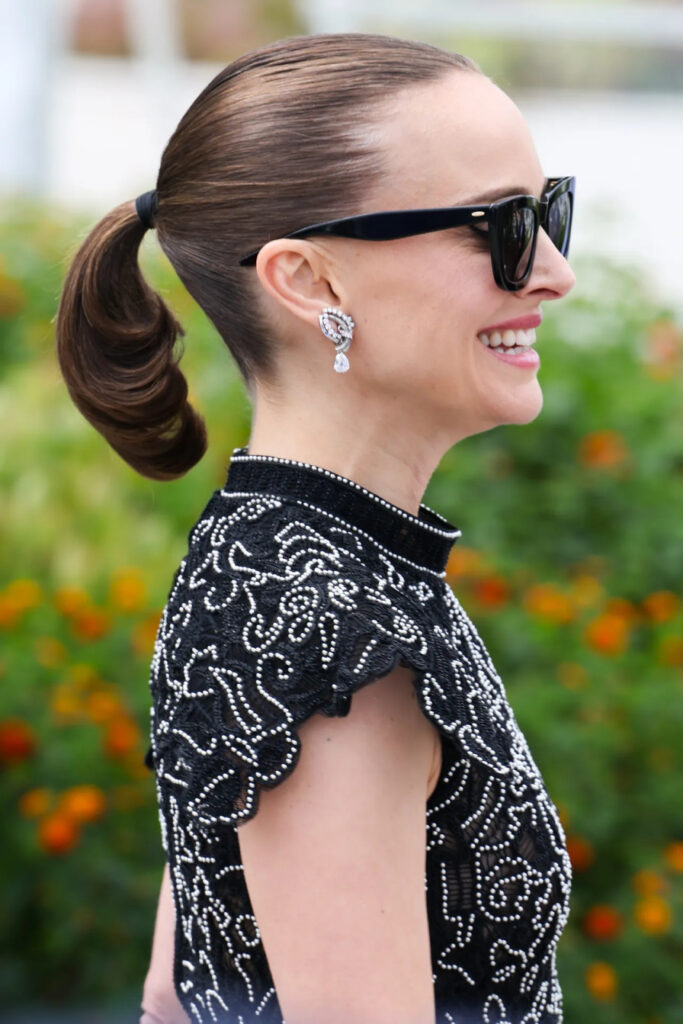
Don’t count yourself out if your hair is short. Tease the crown lightly for fullness, then gather a small ponytail lower on the back of the head, leaving soft pieces around the face. A texture spray beforehand gives shorter layers something to grip so they don’t slip loose by mid-morning. Best for short or fine hair, bobs, and lobs, and what I’d suggest for school, work, or weekend errands when your hair is between lengths.
13. Midi Ponytail:

Sitting right between high and low, this is the most broadly flattering placement on the list. Smooth the front, secure around the middle of the back of the head, and wrap a strand of hair around the elastic for a clean finish. A wax stick tames the hairline without stiffening the rest of the style. Suitable for straight, thick, or fine, medium-to-long hair, and a solid everyday choice for travel and business casual days.
Matching Your Ponytail to the Occasion:
- For weddings, the Polished Low Ponytail, Wispy Ponytail, Curly Ponytail, and Barrette Ponytail read as intentional rather than thrown-together, especially paired with pearl accessories or soft curls.
- For work, the Power Ponytail, Midi Ponytail, Polished Low Ponytail, and Half Ponytail pair cleanly with blazers and structured pieces, and none of them have let me down in a meeting yet.
- For casual days, the Tousled Ponytail, Bubble Ponytail, Twin Ponytails, and Braided Ponytail take well to a scrunchie or ribbon for a bit of extra personality.
- For summer travel, the Boho Knotless Ponytail, Curly Ponytail, Bubble Ponytail, and Tousled Ponytail hold up best in humidity, particularly with lightweight products instead of heavy creams that can go greasy in the heat.
Mistakes I’ve Made So You Don’t Have To:
Wearing it too tight, every single day: I did this for months without noticing my hairline was thinning slightly along the front, a pattern dermatologists refer to as traction alopecia, caused by sustained pulling tension on the same section of hair over time. Alternating between tighter and looser styles, and changing placement day to day, made a real difference for me within a couple of months.
- Using cheap elastics: They snap, they slide, and they pull on hair more than you’d expect. Silk scrunchies and spiral ties are worth the small extra cost, especially if you’re wearing a ponytail most days.
- Skipping heat protectant: I fried a few inches off the ends of my ponytail curling it without protectant on one lazy Sunday. It’s non-negotiable for me now, no exceptions.
- Same placement, every single day: Repeating the exact same spot on your head concentrates tension on the same section of hair repeatedly. Rotating between high, mid, and low gives your hairline an actual break.
- Forgetting to deep condition: Dry hair snaps more easily under tension. A weekly deep-conditioning treatment (I use Olaplex No. 8) has made a visible difference in how shiny and manageable my ponytails look, without changing anything else about how I style them.
Quick Answers to Things People Ask Me:
What’s the best ponytail for thin hair?
The Tousled, Bubble, and Half Ponytail all create the illusion of more volume than you actually have, mostly through crown teasing and loose sectioning.
How do I make a ponytail last all day?
Prep with a texture spray, use a proper hair tie rather than a cheap rubber band, and finish with a flexible-hold hairspray. All three matter, skipping any one of them tends to be where it fails.
Can I do this with short hair?
Yes. The Mini Ponytail and Half Ponytail both work well on shoulder-length hair or shorter, with a texture spray for grip.
Are ponytails appropriate for weddings?
Completely. The Curly, Wispy, and Polished Low Ponytail all look elegant enough to stand in for a full updo, and photograph well under both natural and flash lighting.
What’s the easiest style to start with?
The Midi Ponytail and Tousled Ponytail took me the least practice to get right, and they’re the most forgiving if your sectioning isn’t perfectly even.
Final Thoughts:
If you’d told me a few years ago I’d have thirteen different ponytails in regular rotation, I’d have laughed at the idea. But that’s really the appeal of it, once you start paying attention to placement, prep, and small details like which elastic you’re reaching for, a ponytail stops being a fallback and becomes an actual, deliberate hairstyle choice.
Start with one or two of these that already match how you dress and live day to day, get comfortable with the technique, then branch out from there. Your hair, your hairline, and honestly your mornings will thank you for it.