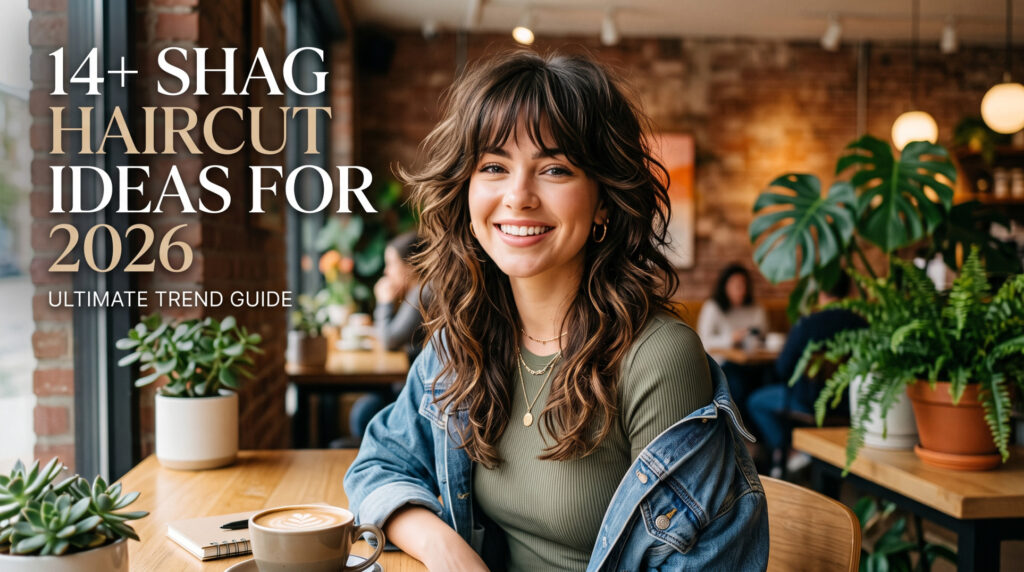
Three weeks ago I sat in my stylist Priya’s chair at the salon near my apartment, staring at a Pinterest board I’d been building for two months, and still couldn’t commit. I’d been blow drying and flat-ironing my hair into submission every single morning for almost four years, and I was done with it. Priya took one look at my board, one look at my hair, and said something that stuck with me: “You don’t want a haircut. You want your mornings back.”
She was right. What I actually wanted was to wake up, towel dry, scrunch in some product, and walk out the door looking like I’d tried without actually trying. She recommended a shag, and honestly I was skeptical, because the last time I’d seen the word “shag” it was on a photo of Jane Fonda from 1971. But the version she cut me was nothing like that.
That was three weeks ago. I’ve flat-ironed my hair exactly zero times since. So I wanted to write the guide I wish I’d had before that appointment, covering not just what the different shag variations actually look like, but the real logistics: what to ask for, what it costs, what mistakes to avoid, and how to figure out which version fits your hair type and face shape instead of just copying a photo and hoping.
What a Shag Haircut Actually Is?
A shag is a layered haircut where the layers are intentionally uneven, cut in different lengths throughout the head instead of one consistent length like you’d get with a blunt bob. That unevenness is wat creates the volume, movement, and texture the cut is known for.
Priya explained it to me this way during my consultation: with a one-length haircut, your hair falls in a single curtain and relies entirely on styling to create shape. With a shag, the shape is already built into the cut itself, so even flat, unstyled hair still has body and separation.
What makes the 2026 version different from the shag’s earlier eras is the blending. Older shags, especially the ones from the 2020-2022 revival, leaned into choppy, disconnected pieces that looked deliberately messy. The current version softens those transitions so the layers flow into each other rather than looking cut in blocks. It reads as intentional instead of unfinished.
Why This Haircut Is Everywhere Again?
I asked Priya directly why she’s been booking more shag appointments than any other single style this year, and her answer matched what I’d noticed in my own life: people are exhausted by high-maintenance hair.
Over the past few years, the trend cycle pushed extremely polished, retouched-looking hair, the kind you’d need a blowout bar appointment to actually replicate at home. That’s shifted hard toward hair that looks touchable and slightly imperfect on purpose. A shag fits that shift because the cut is designed to look intentional even when it’s doing nothing at all.
There’s also a prctical piece nobody talks about enough: a shag genuinely works with textured, wavy, and curly hair instead of requiring you to fight it into a shape it doesn’t naturally want to hold. If you’ve ever tried to keep a one length curly cut looking full instead of triangular, you already know how much of a relief that is.
The 14+ Shag Variations, Broken Down Properly:
I’m grouping these by what actually distinguishes them, since a list of fourteen near-identical descriptions doesn’t help anyone pick the right one.
The original formula: shorter layers concentrated around the crown, longer pieces through the sides and back. This is the version Priya started mine as, before we adjusted the fringe. If you’re nervous about committing to something dramatic, this is the safest entry point because most stylists can execute it consistently, and it photographs the way people expect a “shag” to look.
Styling note: I use a dime sized amount of Oribe’s Curl Shaping Mousse on damp hair, scrunch it in, and either air dry or diffuse on low heat. It took me three tries to find a product that gave hold without stiffness. My first attempt with a heavier gel left my layers glued together instead of separated.
My friend Dana has type 3A curls and got this version about eight months ago after years of a one-length cut that she said “just sat there like a helmet.” The shag layers let each curl group move on its own instead of clumping into one solid shape.
The detail that matters most here: curls shrink significantly once they’re fully dry, sometimes two to three inches for tighter curl patterns. Dana’s stylist cut her hair dry, not wet, specifically to account for that shrinkage and avoid an accidental drastic cut. If your stylist is cutting curly hair wet without discussing shrinkage first, that’s worth asking about directly.
Good candidates for this version:
Naturally curly or coily hair, types 2C through 4A
Medium to thick density
A preference for more separation between curls
Interest in a soft curly fringe rather than a blunt one
This is the version built for people who need their hair to work in professional settings but still want the texture. The layering is real but more controlled, with smother transitions between sections rather than obvious jumps in length.
I’d point this one out specifically to anyone who works somewhere formal, because it avoids the more rock and roll, undone look some of the other variations lean into. A colleague of mine, an accountant who wears her hair in blowouts for client meetings, got this exact version and still gets it flat ironed for work while letting it air dry naturally on weekends. The layering means both looks work with the same underlying cut.
This is the most deliberately “undone” version on the list, built around second-day-hair texture from the moment you leave the salon. The layers are cut to encourage separation rather than smoothness. I learned the hard way that this version does not tolerate a paddle brush. I brushed mine flat before a work event once, thinking it would look neater, and it instead looked like a completely different, much blnder haircut. The layers need to stay separated with your fingers or a wide-tooth comb, never a bristle brush, or the entire point of the cut disappears.
Landing somewhere between the shoulders and the collarbone, this length keeps enough hair for a low ponytail or half-up style while still carrying real volume from the layering. It’s the version I’d recommend to someone transitioning out of a lob who isn’t ready to commit to shorter, more dramatic layering.
A specific request worth making: ask your stylist to position the shortest face-framing layer at your cheekbone level rather than your chin. That single adjustment changes how much the cut visually lifts your face, and it’s a detail a lot of first-time shag clients don’t think to specify.
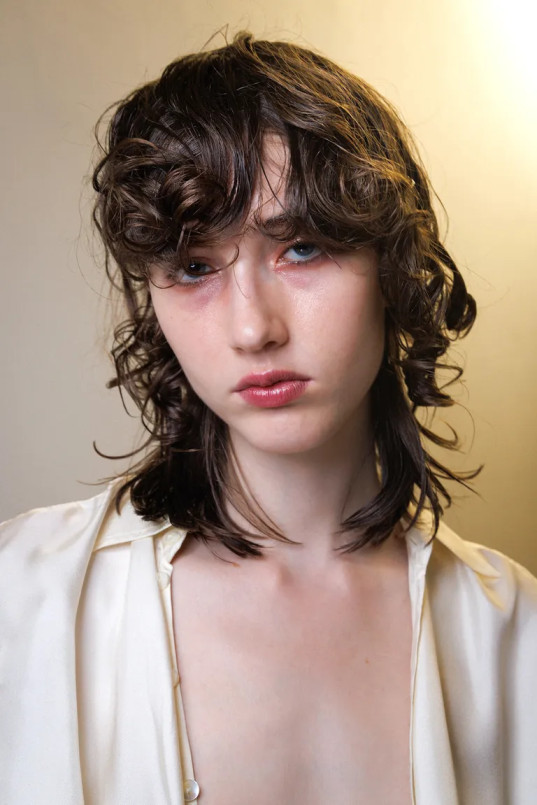
Part shag, part mullet. This version keeps textured, shorter layers around the crown and sides while letting length extend further at the back than a typical shag would allow.
My sister got this cut in the spring and I’ll admit I doubted it in the consultation photos. In person, once the layers were blended rather than left choppy, it read as edgy without looking costume-like. If you want the shullet’s personality without the full commitment, ask your stylist to reduce the length difference between the front and back sections, which softens the transition considerably.
Consider this version if you want:
A more rebellious silhouette than a standard shag
Strong, obvious texture rather than subtle layering
A cut that holds its shape even with minimal styling
Something distinct from the more common shag variations
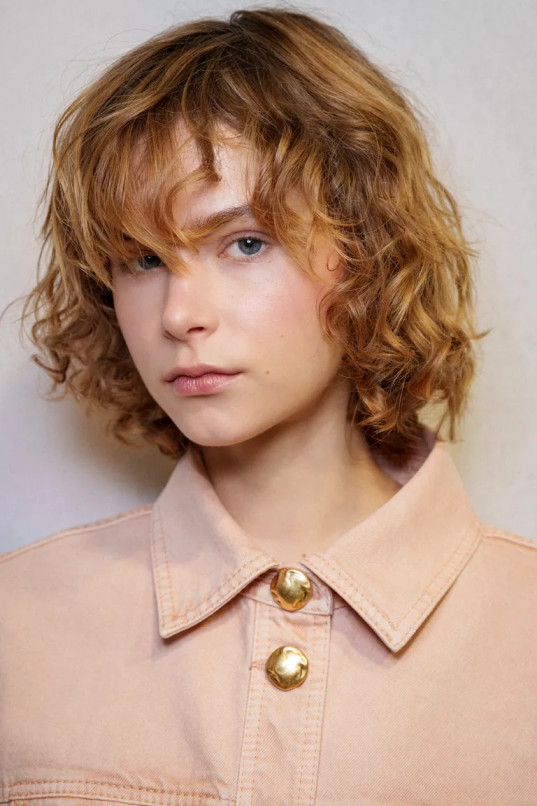
Removing length and weight from curly hair changes how the curls behave, often dramatically. Less weight pulling curls down means more spring and volume, which is the entire appeal of this shorter version.
Air drying tends to outperform heat styling here, since the goal is showing off natural curl pattern rather than manipulating it into something else. If you’re going this short with curly hair for the first time, ask your stylist about a curl by curl dry cut rather than a wet cut with a general layering plan, since it gives more precise control over the final shape.
This version is built almost entirely around minimal styling. Long layers combined with shorter face framing pieces create a relaxed silhouette that looks intentional even straight out of the shower. For the lowest maintenance version of this look, apply a lightweight leave in like Verb’s Ghost Oil to damp hair and let it air dry without touching it further. That’s genuinely the entire routine on a busy morning.
Because the length gives you more to work with, this cut adapts to more finished looks too:
This version is designed for hair that naturally behaves differently across the head, which is more common than people realize. My own hair is straighter at the crown and wavier toward the ends, and I used to think that inconsistency was a problem to fix. Priya pointed out it’s actually ideal for this variation, since the layering works with each section’s natural pattern instead of forcing uniformity through heat styling.
If your hair has ever been described as “having a mind of its own” by a previous stylist, this is worth bringing up specifically at your next consultation.
Not every shag needs an edgy or undone finish. This version uses longer, softer layers and delicate face framing to create something closer to elegant than rebellious, the kind of shape that photographs well for events without looking overly done.
Soft waves from a one inch curling iron enhance this version particularly well, since the wave pattern complements the blended layering instead of competing with it.
Changing your part is one of the most underrated ways to reshape how a haircut reads day to day. A deep side part on a long shag adds volume on one side and gives the whole cut a relaxed, asymmetrical feel that a center part doesn’t create in the same way. This version needs some natural density to hold its shpe properly, so it’s worth asking your stylist honestly whether your hair type supports it before committing to the deep-part styling as your default look.
Styling detail: skip the brush entirely here. Use your fingers or a wide-tooth comb to preserve the separation between layers, which is what gives the side part its lift.
The wolf cut is the shag’s more dramatic sibling, combining shag-style layering with heavier crown volume and a mullet-influenced silhouette toward the back. It can range from fairly subtle to genuinely bold depending on how far your stylist pushes the crown volume.
Shag versus wolf cut, explained simply: a traditional shag distributes layers fairly evenly throughout the head. A wolf cut concentrates significantly more volume at the crown and creates a much stronger contrast between the top and the ends. If you’ve seen both terms used interchangeably online, they’re related but not the same request to bring to a stylist.
This combines the shag’s texture with a long bob’s length, usually landing around the shoulders or collarbone. It’s a solid entry point if you’re curious about shag layering but not ready to lose significant length.
If you have fine hair, flg this specifically before your appointment. Overly aggressive layering on fine hair can make the ends look thin and see-through rather than textured. A good stylist will keep more weight through the perimeter while still creating movement higher up, which preserves the appearance of density.
This version is defined by the tool, not just the shape. A razor creates softer, feathered ends compared to scissors, producing the seamless blending associated with the most polished modern shags.
Razor cutting requires real technical skill, and a poorly executed razor cut can leave uneven, wispy ends that are difficult to correct quickly. Ask to see a stylist’s portfolio specifically featuring razor work before booking this version, rather than assuming any stylist can execute it well.
Matching the Shag to Your Hair Type:
Straight hair: layers add movement that’s often missing entirely from straight, one-length cuts. Ask for soft layering with face-framing pieces, and use a texturizing spray like Oribe’s Dry Texturizing Spray so the ends don’t fall flat by afternoon.
Wavy hair: this is close to the easiest hair type to work with for a shag, since your natural bend does most of the styling work for you. Avoid heavy creams or oils, which weigh waves down and cancel out the texture the cut is designed to show off.
Curly hair: can look extremely full and dynamic with the right layering. Discuss your curl pattern and shrinkage with your stylist before the cut begins, and consider requesting a dry cut for more precise results.
Thick hair: can handle heavier layering without losing structure. Removing weight through layering often makes thick hair feel lighter and considerably easier to manage day to day.
Fine hair: needs a more conservative approach. Heavy layering throughout can make fine hair look sparse rather than textured. Ask for a shag-inspired cut with strategic face framing while keeping length through the ends to maintain the appearance of density.
Face Shape Considerations:
Hair type isn’t the only factor worth discussing with your stylist. Face shape affects where the shortest layers should land.
Round faces generally benefit from layers that start below the cheekbone, which elongates the face rather than adding width at its widest point.
Square faces often look softened by wispy, textured fringe that breaks up strong jawlines.
Oval faces have the most flexibility and can usually wear nearly any version on this list without adjustment.
Heart-shaped faces tend to look balanced with layers that add width near the jaw to offset a narrower chin.
This isn’t a rigid rulebook, and a skilled stylist will adjust based on your actual features during the consultation rather than following a chart exactly. But knowing your face shape gives you better language to describe what you want.
What a Shag Actually Costs?
Pricing varies significantly by region and salon tier, but based on my own appointment and conversations with three other stylists at different salons, a shag haircut typically runs somewhere between $60 and $180 at a mid-range salon, with high-end salons in major cities charging more, sometimes $200 or above for a senior stylist. Razor-cut versions and cuts requiring more consultation time, like curly shags, often sit at the higher end of that range because they take longer to execute properly.
If you’re budget-conscious, ask whether a stylist-in-training or associate stylist can perform the cut under supervision, which is often available at a reduced rate at larger salons.
Color Pairings Worth Knowing About
Shags are frequently paired with specific coloring techniques that enhance the layering rather than compete with it.
Face-framing highlights, sometimes called money-piece highlighting, brighten the shortest layers around the face and make the framing more visible. Balayage adds dimension throughout longer layers without the harsh regrowth line of traditional foils, which pairs particularly well with the low-maintenance philosophy of the cut. If you’re not ready for a color commitment, even a gloss treatment can add enough shine to make the layering read more clearly in photos.
My Actual Morning Routine, Step by Step:
People assume a shag requires an elaborate routine. Mine takes under ten minutes on a normal morning.
Step 1: Towel dry gently:
I switched from a regular bath towel to a microfiber hair towel a while back, and it genuinely reduced frizz. Regular towel fibers rough up the hair cuticle; microfiber doesn’t.
Step 2: Apply product suited to your texture:
Waves and curls do well with a curl cream or mousse. Straight hair typically responds better to a lightweight texturizing spray applied to dry or slightly damp hair.
Step 3: Encourage movement, don’t force it:
I scrunch gently with my hands rather than combing through. On days I use a diffuser, I keep it on the lowest heat setting to avoid drying out the ends.
Step 4: Finish with a small amount of texture product:
Once dry, I work a small amount of texture spray or a pea-sized bit of styling cream through just the ends and layers, never the roots.
That’s the entire process. No round brush, no flat iron most days.
Maintenance and Trim Schedule:
Something Priya told me that I hadn’t heard before: bangs and face-framing pieces grow out visibly faster than the rest of a shag because they’re cut shorter to begin with, so they need proportionally less growth before the shape changes. A general trim schedule runs somewhere between six and twelve weeks, depending on your hair’s growth rate, how structured your version is, and whether you have bangs. If you’re planning to grow the cut out into something longer eventually, you can typically stretch that window. Shorter, heavily layered versions or ones with structured bangs need more frequent visits to hold their shape.
Mistakes Worth Avoiding:
Skipping reference photos: On my first consultation, I said “I want a shag” as if that meant one specific thing. It doesn’t. Bring two or three photos shwing your target hair texture, length, and amount of layering, since “shag” covers an enormous range of results.
Overstyling the cut: Heavy brushing, excessive product, or too much heat styling flattens the exact texture you’re paying for. This cut is meant to be worked with your fingers, not smoothed into submission.
Not disclosing your real routine: If you’re not going to diffuse your hair every morning realistically, don’t request a cut that depends on it to look finished. Be honest with your stylist about your actual habits so they can shape the cut around your real life.
Ignoring face shape and hair density entirely: A quick conversation about where the shortest layers should sit relative to your face shape can meaningfully change how flattering the final result is.
Assuming curly hair should be cut wet: As Dana’s experience showed, curly hair cut wet without accounting for shrinkage can end up shorter than intended. Ask your stylist directly how they plan to account for this.
Frequently Asked Questions:
How much does a shag haircut typically cost?
Expect roughly $60 to $180 at most mid range salons, with higher-end salons charging more, particularly for razor cuts or curly hair specialists who need extra consultation time.
Is a shag still trending in 2026, or is it on its way out?
It’s still strong. The current version is softer and more blended than the choppier styles from a few years ago, which appears to be why it’s had more staying power this time around.
Does a shag work with fine hair without making it look thinner?
Yes, as long as the layering is kept conservative and length is preserved through the ends. Heavy layering throughout tends to backfire on fine hair.
What’s the real difference between a shag and a wolf cut?
Both rely on heavy layering, but a wolf cut concentrates more volume at the crown and creates a stronger contrast between the top and the length. A traditional shag distributes its layers more evenly.
Can curly hair handle this cut well?
Very well, generally. The key is discussing curl pattern and shrinkage with your stylist ahead of time, and considering a dry cut for more predictable results.
How often does a shag need to be trimmed?
Roughly every six to twelve weeks, depending on how structured the cut is and whether it includes bangs, which grow out visibly faster than the rest.
Should I get color done at the same time as the cut?
It’s common to pair a shag with face-framing highlights or balayage, but it’s not required. If you’re not ready to commit to color, a gloss treatment adds shine that helps the layering stand out without a long-term commitment.
What questions should I ask before booking?
Ask to see a portfolio of the stylist’s shag work specifically, confirm whether they’ll cut curly hair wet or dry, and be upfront about how much daily styling time you’re realistically willing to spend.
Final Thoughts:
If you’re genuinely on the fence, my advice is to book the consultation even if you’re not ready to commit that same day. Bring reference photos, ask about the specific tools and techniques your stylist plans to use, and be honest about how much time you actually want to spend on your hair each morning.
Three weeks in, the thing I appreciate most about mine isn’t really the haircut itself. It’s that I stopped thinking about my hair every morning entirely. It just does its own thing now, and for the first time in years, that’s actually the point.
Style Nexus is written and run by Matilda. What started as a personal interest in fashion, beauty, and everyday styling grew into this site a place to share outfit ideas, beauty tips, and style inspiration with anyone looking for a bit of direction on their own look.