

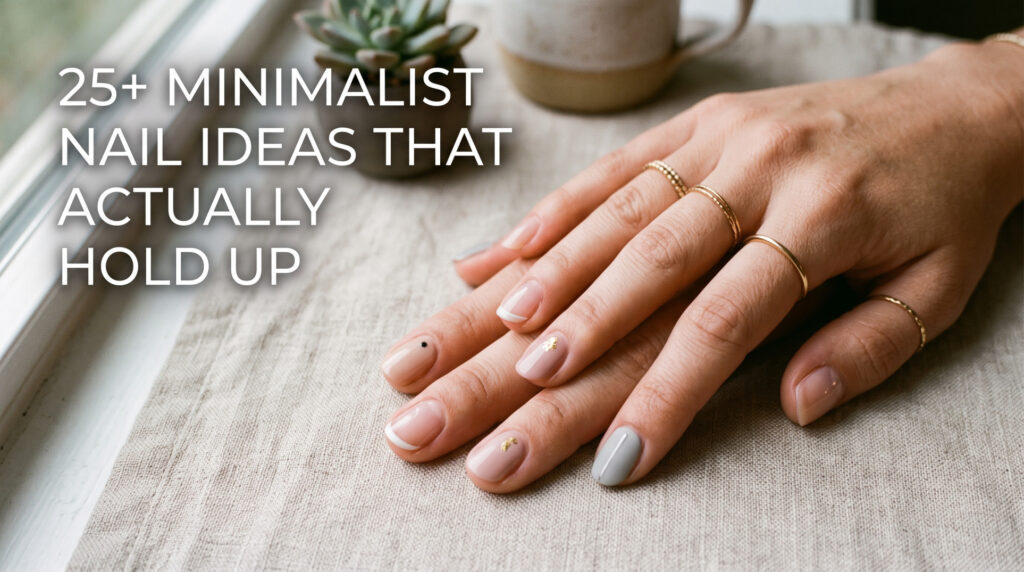
Three years ago I paid $95 for a hand-painted floral set with 3D gems on every nail. It looked incredible walking out of the salon. By day four, one gem had already popped off in a sink drain, two nails had chipped at the tip, and I spent the rest of the week hiding my left hand in every photo. The next appointment, I asked my tech, Priya, at the salon I still go to, for something plain: a sheer pink base and a single gold fleck on one nail. Total cost, $42. It lasted three full weeks without a single chip.
That was the appointment that converted me. Minimalist nails are not the “safe, boring” choice people assume they are. They are the design category that survives actual life: dishes, gym chalk, a laptop keyboard eight hours a day, and three weeks of regrowth without looking like it needs redoing.
This list covers more than 25 minimalist looks, but I have also added the details most nail articles skip: roughly what each style costs, how long it realistically holds up, which shapes and lengths it suits, and a full at-home version you can do yourself if you are not near a salon. No fluff, no filler, just what I would actually tell a friend before her next appointment.
How Much Do Minimalist Nail Designs Cost?
Pricing varies a lot by city and salon tier, but here is a general range based on what I have paid and what friends have reported across a few different salons:
- A basic gel manicure with no design: $35 to $55
- Adding one accent nail (a charm, foil, or simple line detail): add $5 to $15 on top of the base price
- A full marble, swirl, or French variation across all ten nails: add $15 to $30 on top
- Press-on versions of most of these looks, done at home: $8 to $20 for a full set from brands like Static Nails, Olive & June, or Kiss imPress
If a salon quotes you significantly more than these ranges for a single accent nail, it is worth asking exactly what technique is involved, since some materials (like genuine gold leaf or hand-set crystals) do cost more than standard foil or acrylic charms.
How Long Do These Actually Last?
This is the part most inspiration lists skip entirely, and it is the part that actually matters for deciding what to book.
2 to 3 weeks: Solid color bases with one small accent detail (dots, foil scatter, single charm) tend to hold up the longest because there is less surface area for chipping to show.
10 to 14 days: Marble and swirl designs still look good but the swirl detail can start looking muddier as the polish naturally wears and the top coat dulls slightly.
7 to 10 days: French tip variations, especially thin line details like the micro French or contour French, show wear fastest because any tip growth immediately breaks up the clean line.
If you are someone who goes three or four weeks between appointments, lead with a solid base and one accent detail rather than anything relying on a crisp tip line.
Best Minimalist Nail Ideas for Short Nails
Not every design translates well onto shorter or squarer nails, so here is what actually works if you keep yours short:
- Pink Swiss dot and white confetti dots, since dots scale down without losing their shape
- Corner accent French, because it does not need length to read clearly
- Noir half dip on square nails specifically looks better short, since the sharp line works with the shape
- Gold foil scatter, which needs zero length to look intentional
Skip the wire bow and any 3D charm placement if your nails are on the shorter side. These tend to need almond or oval length to sit properly without catching on things.
Charm and Foil Accents:
1. Evil eye charm on milky pink:
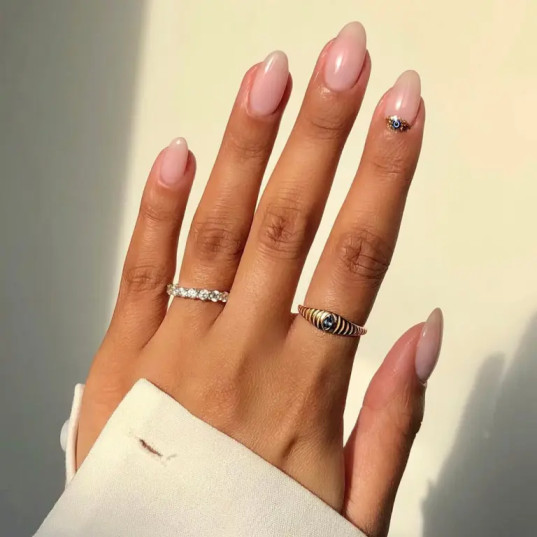
A soft pink almond base with a tiny evil eye charm and a light scatter of gold glitter around it on one nail only. This was my very first accent nail and it is still the one I request most, usually running about $10 extra on top of a standard gel manicure. Ask your tech whether they use a UV gel to seal the charm down, since charms attached with regular top coat alone tend to lift within the first week.
2. Tiny wire bow:

One nail gets a small pre-made wire bow, the rest stay sheer pink shimmer. Most salons doing modern nail art keep a small tray of these charms, usually priced at $3 to $8 each. Works best on almond or oval shapes at medium length or longer.
3. Gold foil scatter:
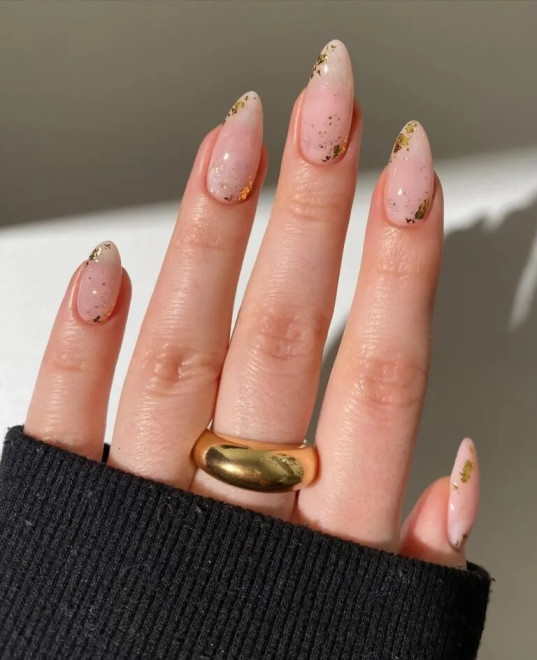
The lowest-effort, highest-payoff option on this whole list. Sheer pink polish, then loose gold foil flakes pressed on while the top coat is still tacky. At home, a foil flake kit from a brand like Born Pretty or Manly Nails runs about $6 to $9 online and covers several manicures.
Marble and Swirl Designs:
4. Rose quartz marble:

Faint white veining swirled into a pink base, meant to mimic holding an actual rose quartz crystal up to light. The trick is restraint. Techs who add too much white end up with something closer to tie-dye than stone. Ask for “one thin swirl pass” specifically if you want the subtle version.
5. Milky pink marble:

A cloudy, milky pink base with soft white marbling running through it. This one photographs unusually well in daylight, which is worth knowing if you take a lot of hand photos for work or social content.
6. Frosted swirl:

White wave shapes freehanded across a clear nude base, with each nail slightly different from the next. This holds up well for events like weddings because it looks custom-made without needing multiple appointments to plan.
7. Slate and blush swirl:

Cool grey almond nails paired with one blush pink accent nail and a faint swirl. This reads as quiet and expensive rather than plain, and it is a solid pick for offices where bold color feels like too much.
French Tip Variations Worth Requesting:
8. Cobalt heart French:

Full cobalt blue tips with a small painted heart on the accent nail. The color is bold, but keeping the shape a classic almond keeps the whole look from feeling loud.
9. Contour French tip:

Ultra-thin black curved lines outlining sheer pink nails instead of a solid white tip. This creates negative space that visually lengthens the nail, which is genuinely one of the better tricks for anyone growing out a shorter set.
10. Corner accent French:

Only the corners get a black accent on a nude pink base, rather than tipping the whole edge. A small change that reads as noticeably more current than a standard French set.
11. Hot pink French:
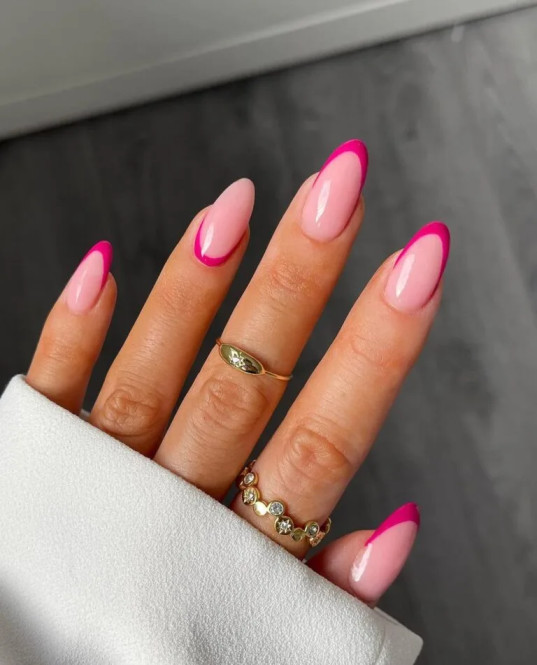
Hot pink tips over a milky base, solving the usual choice between a bold color and a classic shape by giving you both.
12. Black micro French:

The thinnest possible black line traced along the tip. It reads almost architectural, closer to a fine-liner drawing than a typical French manicure.
13. White swirl French:

White curves that melt into a French tip on some nails and go fully abstract on others. Bring a photo reference for this one specifically, since it is difficult to describe accurately out loud.
14. Stacked line detail:
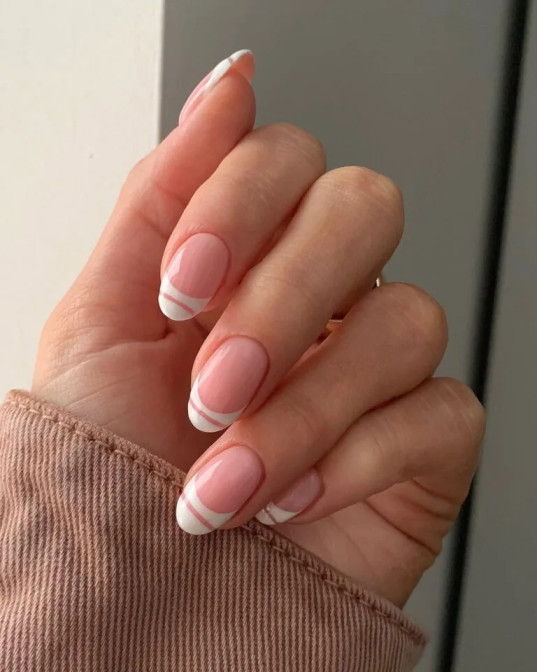
Two thin white lines at the tip instead of the usual single line. It adds roughly thirty seconds to the appointment and noticeably changes how a classic French set looks.
Dot and Pattern Details:
15. Pink Swiss dot:
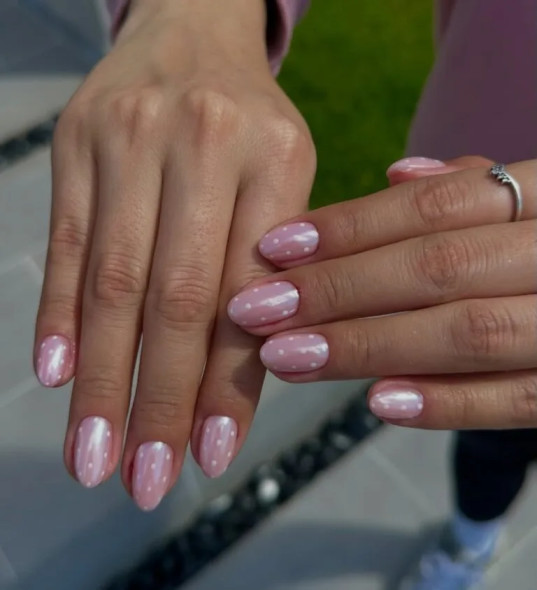
Soft pink oval nails with small white dots scattered across them. Works for both dressed-up occasions and everyday wear without needing to be changed for either.
16. Bordeaux dot mix:

Deep wine solid nails mixed with sheer pink nails carrying matching burgundy dots. A good middle ground for anyone who assumes polka dots read as too playful for their taste, since the wine tone grounds it.
17. White confetti dots:

Milky nude almond nails speckled with small white dots for a light, confetti-like texture. Adds visual interest without introducing any bold color.
18. Cherry dot duo:
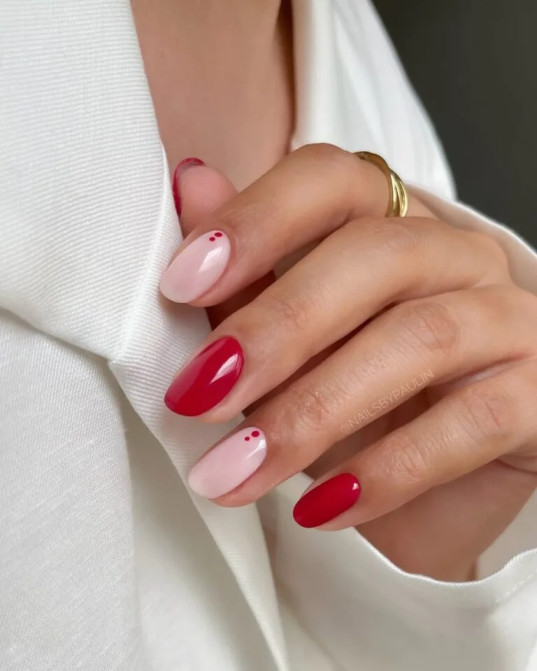
Glossy cherry red nails alternating with milky pink nails, each getting exactly two small dots near the cuticle. The limited dot count is what keeps this from feeling busy.
Shimmer and Metallic Finishes:
19. Sugar dust skittles:
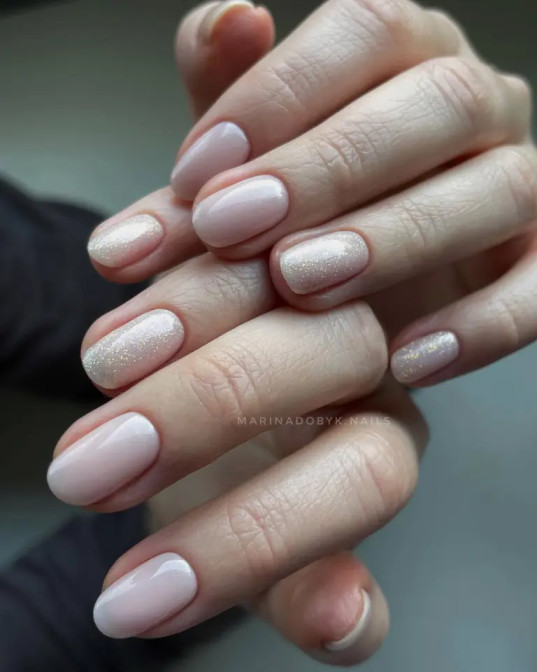
A milky nude base across most nails with a shimmer accent nail or two mixed in, sometimes called a “skittle” set. The shimmer catches light without the mess of loose glitter polish, which tends to be harder to remove cleanly.
20. Pink shimmer:
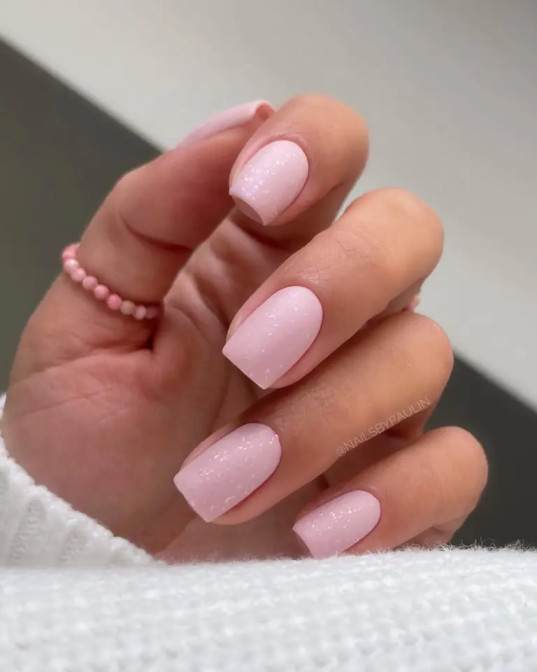
Soft pink polish with tiny iridescent flakes mixed through it, a solid pick for anyone who wants a little dimension without committing to an actual design.
21. Metallic pinstripe:
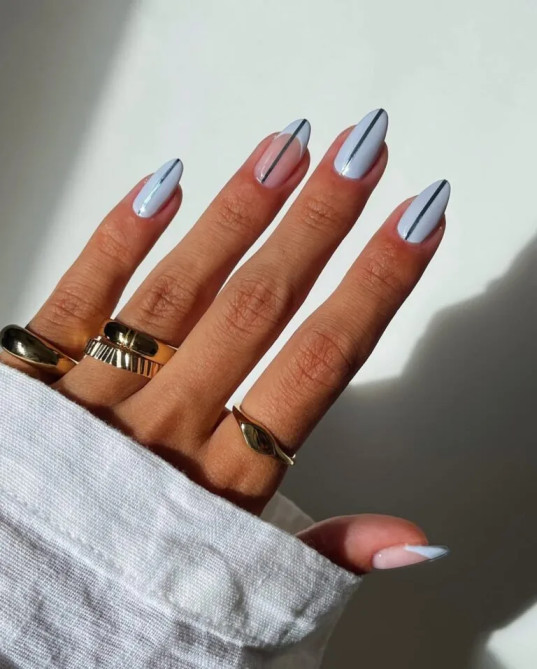
One dark metallic stripe down the center of each grey almond nail, a lower-maintenance alternative to a full chrome set that still gives a metallic pop.
Unexpected Color Combinations
22. Berry blooming tips:

Burgundy that blooms outward on sheer pink almond nails using a blooming gel technique, creating a soft pattern that looks intentional rather than smudged, provided your tech applies the gel while the base is still slightly tacky.
23. Noir half dip:
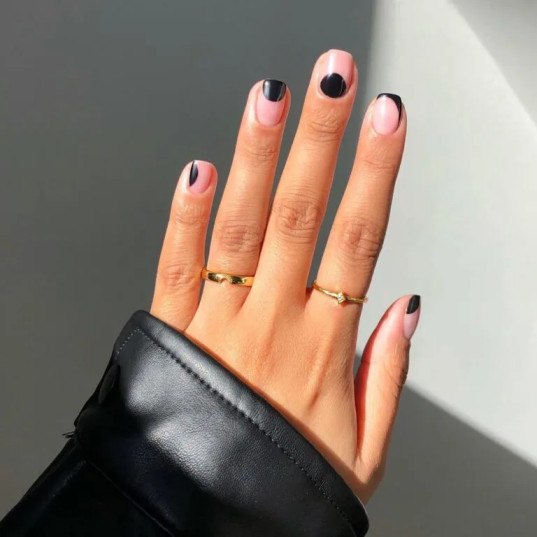
Black polish swooped onto one side of each pink square nail, giving an ink-dipped effect that works surprisingly well even on shorter lengths.
24. Lime mix:
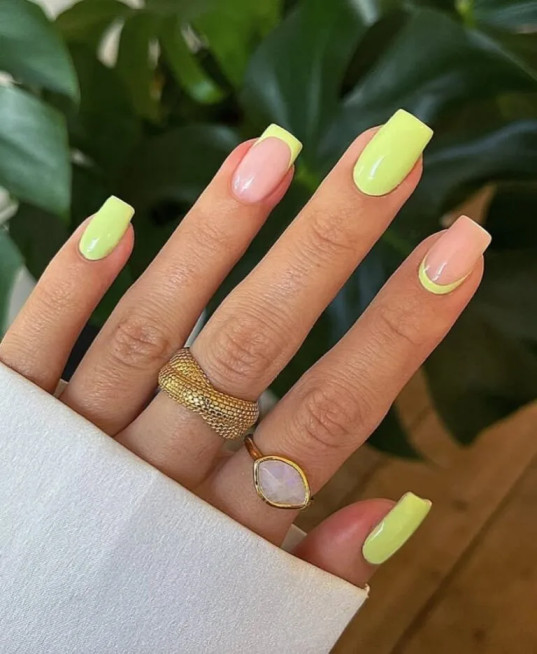
Neon lime worked into a proper French tip structure alternating with nude nails. The structure keeps the bright color from tipping into loud, making it a reasonable pick for anyone who wants one unexpected color for warmer months.
25. Curved white accents:

White curved lines that partially follow the nail shape, somewhere between a French tip and a freeform outline, giving a slightly architectural finish.
How to Do a Minimalist Manicure at Home?
If you are not going to a salon, here is a version of the gold foil scatter look, one of the easiest to recreate yourself.
What you need?
- A sheer pink base polish (essie’s “Ballet Slippers” or a similar sheer pink works well)
- A clear top coat
- Loose gold foil flakes (sold in small jars online)
- A thin nail art brush or a toothpick
- A base coat to protect your natural nail
Steps:
- Apply a thin layer of base coat and let it dry fully, about two minutes.
- Apply one coat of the sheer pink polish and let it dry for a full five minutes before touching it. Rushing this step is the most common reason the color ends up patchy.
- Apply a second thin coat if the color looks uneven, and let it dry again.
- Apply a layer of top coat, and while it is still slightly tacky, use the toothpick to pick up small pieces of gold foil and press them onto the nail in a random, uneven pattern. Do not aim for symmetry, the randomness is the look.
- Let everything set for one minute, then seal with a final top coat over the entire nail to lock the foil flakes in place.
- Wait a full ten minutes before doing anything with your hands, since this is when most home manicures get smudged.
This version typically holds for about a week with regular hand use, a bit less than a professional gel version, since it uses regular polish rather than gel.
How to Ask for These Designs at the Salon?
Describing a nail design out loud rarely gets you what you pictured, since your tech is imagining something different from what is in your head.
- Save a photo rather than describing the design from memory.
- Bring one reference photo, not five, since too many options usually results in a mash-up that resembles none of them well.
- Mention your preferred shape first, since shape changes how any design actually sits on the nail.
- Name the technique if you know it, such as blooming gel, chrome powder, or foil flakes, since not every salon stocks every material.
- If it is your first time trying an accent style, ask about doing a trial on one hand first before committing to all ten nails.
Mistakes Worth Avoiding:
- Rushing the base coat before adding a marble or swirl detail causes the design to bleed into the base color and look muddy instead of crisp. Give the base a full five minutes before layering anything on top.
- Choosing a shimmer polish under salon lighting without checking it in daylight first. Some shimmer looks strong under bright salon lights and nearly disappears outdoors.
- Picking a charm that looks delicate in a photo but turns out to be too large for a smaller nail bed. Ask your tech which charm sizes fit your actual nail width before deciding.
- Skipping a proper top coat because a minimalist design already looks finished. Foil flakes and small dots are more prone to lifting without a solid top coat sealing them in.
- Trying to fake a chrome or metallic finish with regular polish instead of an actual chrome powder. It rarely looks the same, and it is worth asking your salon directly whether they carry the real product before settling for a duller substitute.
Keeping the Look Between Appointments:
A thin layer of cuticle oil applied every two to three days keeps the polish edges from lifting early, which is usually where chipping starts first. For gel manicures specifically, avoid picking at the edges even when they start to lift slightly, since this tends to peel off a larger section of gel than the small piece that was actually loose.
If you are trying to stretch a set to the full three weeks, keep a small bottle of matching top coat on hand and reapply a thin layer once around week two. It adds shine back and protects against the small chips that tend to show up right before your next appointment.
Final Thoughts:
None of these looks require an elaborate nail art setup or an expensive appointment. Most of them work because one detail was chosen and everything else was left alone, which tends to hold up better than five competing elements fighting for attention on the same hand.
Bring a photo, ask about the technique by name, and check in on cost and expected wear time before committing to a full set. That is the difference between leaving the salon happy for a day and leaving happy for three weeks.